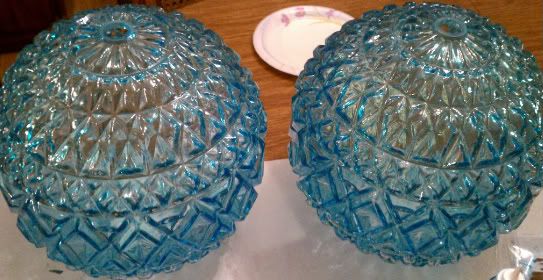
Hi Ya'll, got your coffee?...Good, cause I wanna share our latest garage sale makeover. I found this pair of vintage lamps at a garage sale for only $10, and of course I had to have them....(to go with the other 12 in the garage :) The huge plastic lamp shades were sooo big I could not fit them in the car, (okay...so the car was full of other treasures).
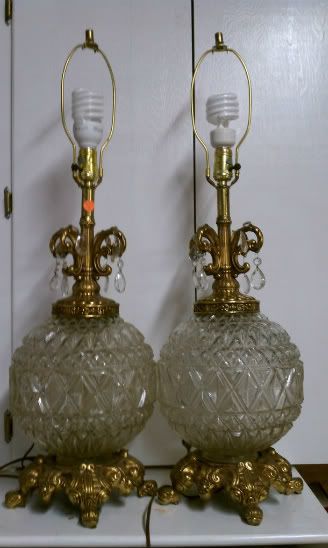 |
Lamps! Lamps! Lamps!
Ya Gotta Love 'Em! |
Well, you don't have to love em', but can you see the potential?.....
So are you ready to jump into the process?....First I grabbed my #1 tool...my smart phone (Love my Sprint Evo)...Taking pictures before I start ripping things apart helps me to get things back together in the right order. I used to think I would remember, but after a few "leftovers" after assembly....I learned to take a pic!
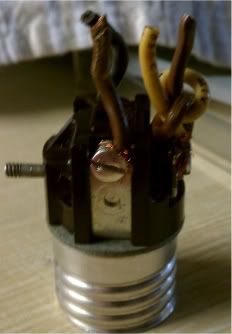
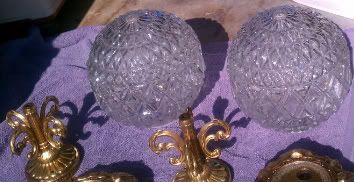
First hurdle...I couldn't get the things apart! After several tries I considered cutting the wires, (little voice is screaming NO at this point), but I didn't think that was the best decision, so I thought about it...then cut the wires anyway. Okay, patience is not my strongest quality, but I did get the brass beasts apart...
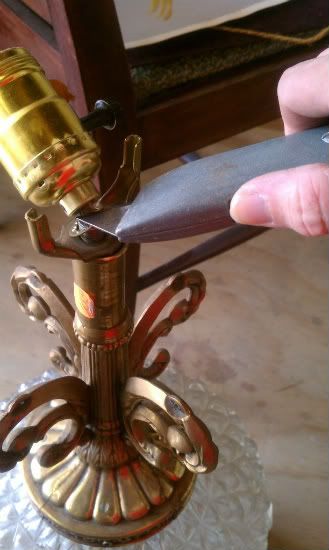 |
| Should I or Shouldn't I? |
|
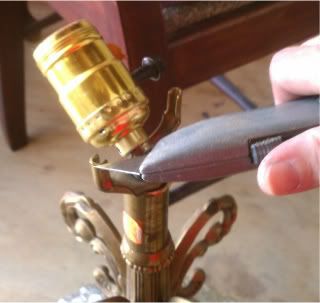 |
| Just Do It!! |
|
 |
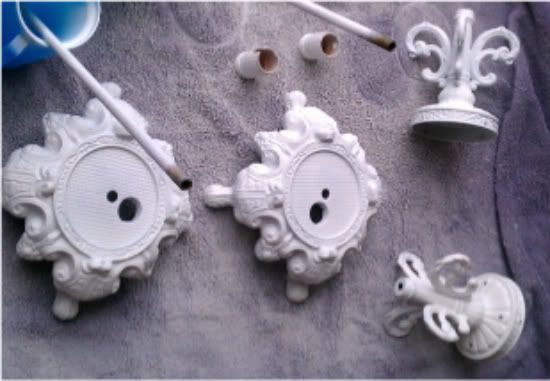
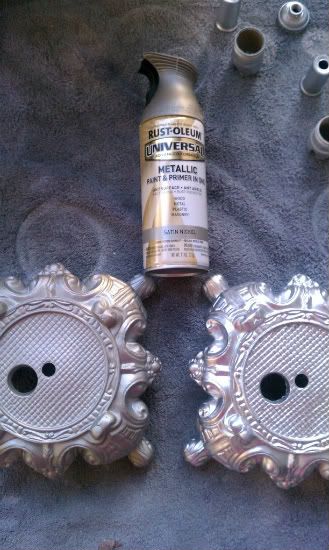
| Brass beasts disassembled! |
|
|
Next, I primed with Rustoleum metal primer (2 coats), and picked out a satin nickel paint....but the trigger was broken, so I went with Krylon sterling silver spray paint instead...in retrospect, probably not the best idea!
 |
| Primed and Ready! |
 |
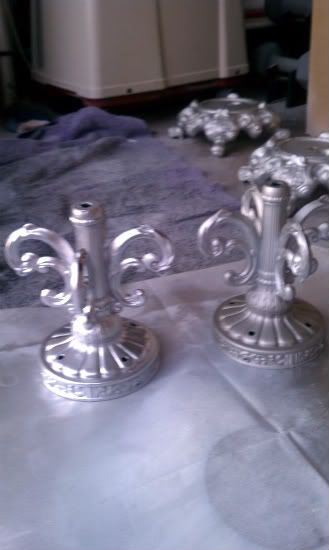
| Shiny? |
|
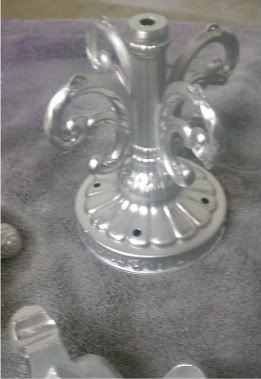 |
Not So Sure About the Sterling....
Whataya think? |
|
| This pic does not do justice to the SHINE....these babies were bright! I love bright, but they kinda looked plastic...so my creative brain went into high gear...What should I do?....how 'bout a little stain to give em' an antique look?....I don't like to think about it too much, I'd rather just try it, so that's what I did.... |
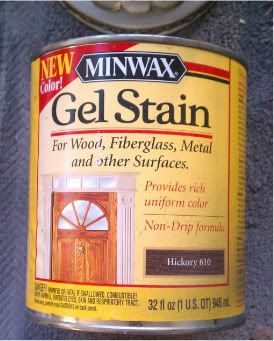 |
| Hickory?....why not! |
Well, I just scrolled through my pics, and I guess I forgot the "antiqued" pic....It was AWWWFUL! The whole thing just looked dull brown, so back to the primer. I only tried the stain on one piece so I only had to reprime and repaint one piece. While waiting for the different coats of paint to dry I started on my idea for the glass....BLUE! I love blue and I have been wanting to try out glass paint so I picked up a few supplies and got started...
 |
| I couldn't decide which blue....so I got both! |
****Advice Moment**** Read the directions on the bottle prior to leaving the store!
I bought the glass paint, went home and then noticed that according to the directions, I needed to prepare the surface with another product first...Oops! So, back to the store where I picked up the prep solution...
 |
| Conditioner...just smells like alcohol! |
****WARNING**** As much as I like Amelia to help me, there is a warning on glass paint about birth defects and reproductive harm....YIKES! I'm not having anymore babies, but I just want to warn all you future mommies to use with caution...
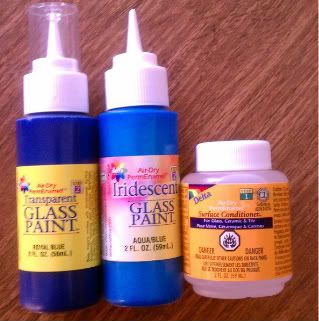 |
| Here is the magic! |
I purchased 2 blues and 2 different kinds of glass paint (cause I can't have things too simple). I chose Delta glass paint in Navy blue transparent, and Aqua blue iridescent. The navy seemed to dark and the aqua was too bright...plus, iridescent sounded more fun than transparent! I mixed the 2 blues 1/2 and 1/2 and then got started painting...I decided to paint the inside of the glass rather than the outside (no chance of chipping off with kid use...you know kids love to touch the "pretty glass"). The paint is dishwasher safe so I think the heat from the inside light will be okay...Here is the result
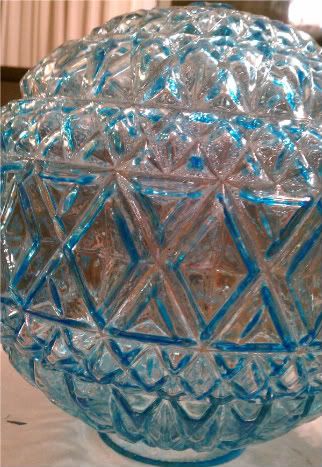 |
| I''m likin' it! |
|
 |
I LOVE Blue!!!
How 'bout you? |
|
Now back to the bright silver...I decided to put a lamp together and see if I liked the look... First I had to become proficient at wiring (since I cut the wires earlier)...thank goodness my husband is so handy, so it wasn't too hard (especially since I used my evo to make sure I knew where each wire went)....
 |
| Wiring too? |
|
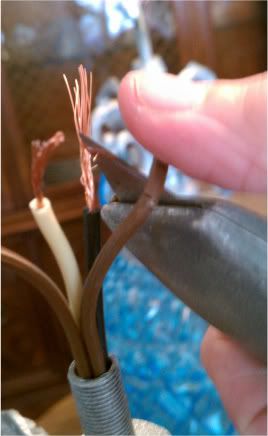 |
| Splice and Dice |
|
And here is the result...whataya think?...
 |
| Too Shiny or Not? |
I asked friends and family and the vote was unanimous...
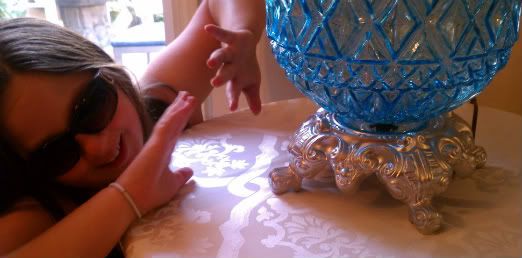 |
| "I gotta wear shades, Mom!!!" |
...The silver needed to be toned down a notch. Back to the paint isle where I picked up some Rustoleum satin nickel...wasn't that my first choice (when will I learn?)... Here are the two side by side...
 |
| Sometimes Dull is Better! |
|
 |
| How many times do I have to paint these? |
|
Done and Done!...Color is right and it is time to paint it all and endure the process of waiting for paint to dry...uuugggghhhhh!
Of course, I can't just wait...I painted a few of the teardrop crystals blue too....gotta have a little bling, right?...READY?!?....
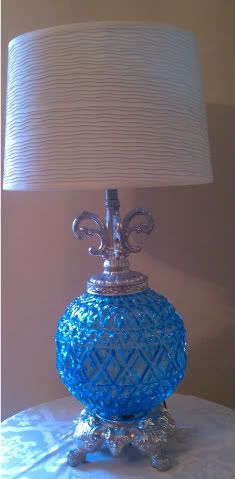
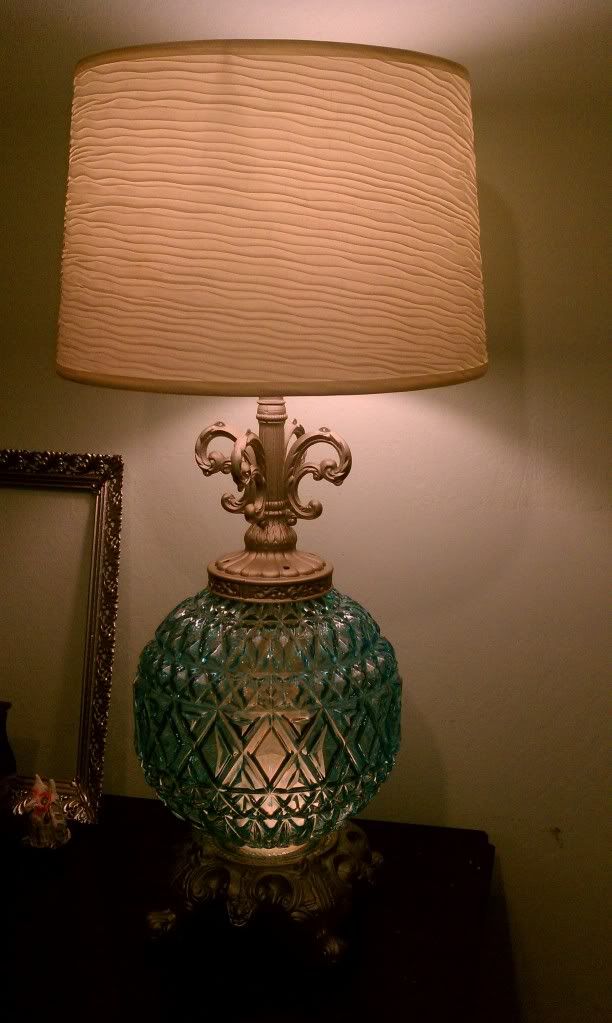
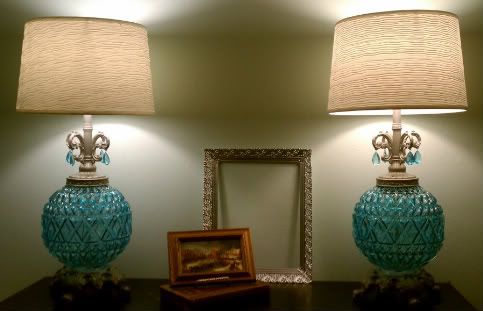
Here is the before and after reveal....be sure and let me know what you think...I love em'!!!
|
 |
| Love my new lamps! |
|
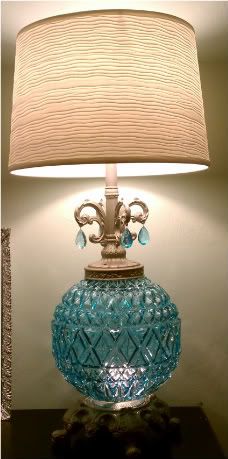 |
Blue is best!
|
Okay, so I didn't really like the "bulb" look at the bottom, so I fixed it with some diffusers...you can see the post HERE...the result is next...
 |
| No teardrops....with diffuser |
I love comments (doesn't everyone), so please "talk to me"...Ya'll are the greatest,
Linking up here...


45 comments:
Love this lamp revamp! Totally updates the lamp! I am looking for bloggers to participate in 25 Day's of Christmas Blogshare...check out the post and leave a comment if you are interested in participating!
Oh Wow! I love your lamps! These turned out awesome! I'm always on the lookout for a pair of lamps, but have never given this kind a second look... not anymore! Thanks for the inspiration! I'm a new follower, btw! God bless! -Holly @ Bellanest.blogspot.com
oh my this is an amazing redo.
I would luv to invite you to share your talent with us at
http://www.passionatelyartistic.com/2011/11/thanksgiving-2011-planner-tutorial-with.html
Our readers will enjoy discovering your blog.
Happy Crafting,
Maggie
http://passionatelyartistic.com
I think my greandmother had a set of these lamps! I'll have to dig them up, I love what you have done to yours! Well done.
That is an amazing transformation! I didn't have much hope for those lamps at the beginning, but you convinced me of their value with your awesome talent!
I'm so impressed. Those lamps came out amazing. I'm not sure I would have seen the potential in them. You did an awesome job. Thanks for sharing at DIYbyDesign's Fall into Fall party.
Wow! I never would have thought of this transformation, but I love it! I'm now following. Stop by for a visit real soon too...
ciao
Thanks for your sweet comment on my blog! I'm your newest follower...your lamps turned out beautiful! Love your blog!
Sally
loveofhomes.blogspot.com
Oh my gosh these turned out so pretty! I'm kinda jealous! I love the shades :) I wouldn't have thought to do this or thought that they would turn out as pretty as they did. Nice thinking!
Very cool!
I'm intrigued by glass paint...but since I'm of "child bearing age" and currently don't have any children...I think I'll pass!
The lamps are fab- great job! Thanks for following me-I return the compliment and now I'm a follower of yours!
What a seriously incredible transformation!! I am so impressed and they truly look so fabulous. :-) I just love your blog and we are so thrilled that you shared this with us at Inspiration Friday this week...hope to see lots more of you in the future!
Vanessa
These are stunning! love the blue - it almost looks turquoise. You did a great job and have tremendous patience. And the satin nickel is better.
Ooooohhh! I really like these! I also liked the brass lamps that you did and props for being so persistent! I would have given up! :)
I really love what you did with these lamps!~ They are absolutely beautiful. I didn't know about the glass paint! I have used liquid silver leaf on lamps before and it's not extremely shiny, almost more pewtery... Thanks for following me! Happy thanksgiving! Jennifer Grenko
Beautiful makeover! Great job!
Hi Lori, I'm a new follower ;)
I am doing pretty much the exact same thing with a lamp that is similar ... same type of base and a glass body (different shape) but I'm stalled at trying to decide on a lamp shade. It's nice to see your transformation finished ... thanks for the inspiration!
I have a lamp very similar to this. So inspired to try this. Thank you so much for sharing. I will be featuring the lamp at my very (late) features party this morning. Thanks!
Great Job on these they came out really cute. I love revamps.
Awwww...I was going to feature your lamp on this week's link party, but none of your photos are showing up! All I see are photobucket fill-in picture saying that your photos have been moved or deleted. :(
Fabulous I love the color you chose for the glass!
WOW !!! TOO BEAUTIFUL, I LOVE THEM !!!
Very Fun.... love the satin nickel... don't we all need to learn??? Smile.
Wow, sooo FABULOUS! I was wondering how you got the crystal blue and yes I love blue too. :)))
Wooooooow!! I have just discovered your blog and I love it!! These lamps are amazing. I would´ve never come up with painting the glas!!! And toning down the silver! that was smart!
I´m a new follower for sure!
Your lamps are truely fabulous, thanks for linking up at tiarasandbowties.blogspot.com. I am simply in awe as to how beautiful they turned out! Very impressive. I (from a blogger standpoint) love the way you have your photos mouseover to show another image. I'd love to learn that trick!
You did a fantastic job on those lamps! They are just too gorgeous!
I love blue too!!!! WOW these turned out amazing!!! Also love you like "trash" to make into treasures - so fitting for our party over on the Korner! Would totally love for you to link this up over at Trash 2 Treasure Tuesdays on Kammy's Korner! http://kammyskorner.blogspot.com/2011/12/trash-2-treasure-tuesdays-10.html
I love to redo lamps, and yours look amazing. How did you paint inside the glass?
Hi Lori, Thanks for linking up to my party. These lamps are beautiful! I'm a follower :)
WOW! Thanks for linking up to my party and I love those lamps! Great idea to put the paint on the inside of the lamps to avoid chipping. Happy New Year and I'm following you now and off to see what other fun stuff you have on here.
These look absolutely amazing! I love how you used the glass paint. Thanks for sharing. :)
Love , Love and LOVE it...First thanx for your sweet comment...I didnt know that I can paint these glass, I found a similar one at a thrift store and I loved it but it was white and i didnt like the color but the one that i saw was 45$ man you are lucky both for 10$ :(
I also love, love, love the lamps. Especially love the blue color with the now toned down silver. You are a pretty creative girl, after checking out the Song birds and your other lamp redo. Thanks so much for sharing with Sunday's Best. PS - now following you on GFC!
Your lamps are so great! Way to update. :)
I made a rhyme!
-Revi
WOW! When I first saw the before and after pic I couldn't imagine that you painted the glass! Awesome redo!
~jill
Lori, WOW!!! I didnt know you could paint glass!! But you are my inspiration! I will be painting some glass!
As for the lamp... I like the teardrops! Did you paint them too? I love blue, red and white!! So now I can go to town with mine!! Thanks hon!
THis is GREAT!!!
You did a great job! The lamps are looking beautiful! Congrats! You had the great idea to paint the glass ! Very impress!
Gorgeous! I love your blog and this project is amazing. Thanks for stopping by my blog, I'm definitely following yours!
Lovely. Adding "glass lamps" to my (getting longer every day) thrift store list.
Gorgeous! Who would have thought that those two shades of blue would make that lovely turquoise color? You are the master!!
You had me second guessing you there for awhile, but it turned out looking great! Are the shades the ones that came with the lamp?
Wow, turned out great...thanks for sharing.
Just wanted to let you know I'm pinning this:) You have inspired me to want to make my own. Now I just need to find glass lamps like the one's you find. I'm on the look out! Thanks for the inspiration!
Post a Comment