Shop Now!

Dresses from Shabby Apple

Blog Roll

Living SavvyPhotobucketPhotobucket beneath my heartMy Repurposed LifeWelcome to daily d !The Shabby Nest Decorchick! RedouxBecolorful crissy berry button180x150button

My Button!

Saturday, December 31, 2011

Organize 2012

Hi Ya'll and Happy New Year's Eve!
Like almost every blogger...I want to be more organized in 2012!  I figured I would start with my blog! It has taken a while to gather tips and tricks for my blog...searching high and low on the web, asking everyone I could think of , and still I am LOST most of the time! BUT...I have found a few tips that were great! Based on my blog surfing, I would say that a lot of you could use these tricks too....or maybe not....you decide. 
Here are my Top 3 Blogger Tips....How to:


1. Post pics side by side on you blog


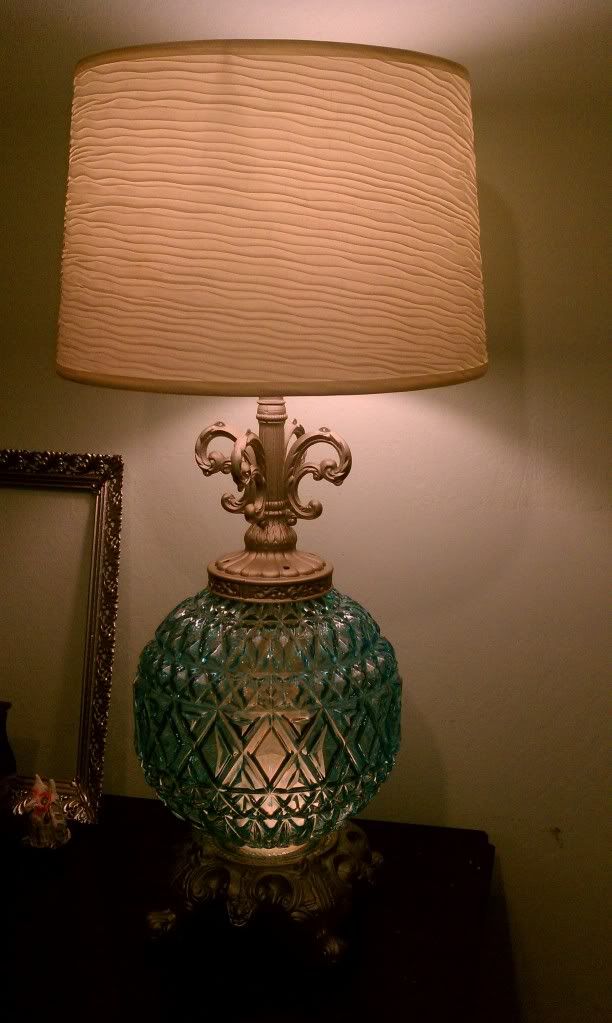
2. Get the "mouse over" before and after pics
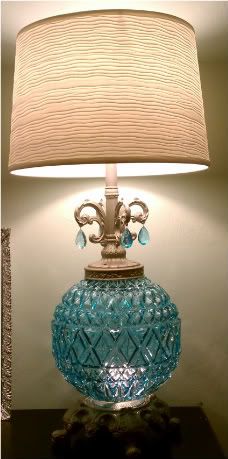

Blue is best!
3. Get small uniform "party" buttons and sidebar buttons

homework


The first tip is for posting pics side by side on your post.... I found this at  Etsy Blog Team. You can follow the link above or here is the HTML code you will need:

<table cellspacing="0" cellpadding="0">
  <tr>
    <td><a href="http://FIRSTIMAGELINK"><img src="http://FIRSTIMAGEURL" border="0" /></a></td>
    <td><a href="http://SECONDIMAGELINK"><img src="http://SECONDIMAGEURL" border="0" /></a></td></tr>
</table>

In the "Edit HTML" tab, copy and paste this code where you want your pics. Next, copy and paste your first pic link twice, where it says "FirstImageURL"...Do the same for your second pic, where it says SecondImageURL. If  you keep pics in photobucket it is really easy....each pic has a direct link button that copies automatically when you click on it.
I linked this on my favorites so I can copy and paste easily each time I need it...You may be smart enough to remember  HTML code, but NOT me!


     ***************************************************
The 2nd tip I found at Addicted 2 Decorating. Kristi, shared this on her blog, but for some reason it took me forever to find it, so maybe you have been looking too!  You can visit her link above, or here is the code you will need...

<center><img onmouseout=”this.src=Put AFTER pic link here’” onmouseover=”this.src=’Put BEFORE pic link here’” src=”Put AFTER pic link here” /></center>

Just copy and paste this HTML code where you want your "rollover" pics. You will need to do this under the edit HTML tab. Copy and paste your after pic link, twice as indicated. Copy and paste your before  pic link where indicated. Easy Peasy...Thanks Kristi!
   
          ***********************************************

Last, but my fav is making all those buttons nice and neat! This took me the longest to discover, so let's give a big shout out to Homework. I emailed Carolyn after seeing her organized buttons and she was kind enough to respond!  Here is what you need to do....
In edit HTML, place the button code on your page and then add: width="75" after the src code and end quote....like so....

<br /> <center><a href="http://www.bleak2unique.com/"><img src="http://i66.photobucket.com/albums/h260/toonybug/CBOTB%20ALBUM/button2-7.png" width="75" /></a></center><br /> 


In addition, I also got a response from Too Much Time on my Hands. Kim had an additional suggestion for those pesky buttons that will not move from center....
In the example above (my button...sorry it is one of the pesky ones!), there are break codes and center codes...these need to be removed, like so....

<br /> <center><a href="http://www.bleak2unique.com/"><img src="http://i66.photobucket.com/albums/h260/toonybug/CBOTB%20ALBUM/button2-7.png" width="75" /></a></center><br /> 

The final code should look like this....

<a href="http://www.bleak2unique.com/"><img src="http://i66.photobucket.com/albums/h260/toonybug/CBOTB%20ALBUM/button2-7.png" width="75" /></a>

Be sure and  enter each code next to the previous code....if you paste the code on the next empty line, your buttons will not be side by side.  


I hope that ya'll find these hints helpful....Be sure and visit all the featured blogs, since they are the reason I can share these hints with you! 


I love all your comments...let me know if you can use this, or if you were already "up to date" on the latest blog stuff. Let me know of any other hints you have that would help out all us new bloggers....Ya'll are the greatest followers on the blog, OXOXOX 

homeworkThe Southern Product QueenButtonand then, she {snapped}five days five ways | feature friday free for allThe Shabby NestOne Artsy Mama

Wednesday, December 28, 2011

Song Birds

Hi Y'all, I'm ready to get busy with a new project, how about you?  I picked up a couple of "love birds" at the dollar tree with the plan of painting them white. I love all the cute white accessories out in the blogoshpere, and I couldn't pass up a chance to make a set of  birds for $2! Sometimes things don't go as planned, BUT even better....
Here is a glimpse of the original "sand" birds....
Sand bird????
As you can see they are not the cutest, but pretty good for $1. I assume they landed at the dollar store because some creative genius decided to put glue on em' and roll em' in sand....NOT the best idea! Maybe if they were completed covered in sand...a beachy theme?  Anyway I was not interested in beach birds so I started sanding. I believe the sand was applied with gorilla glue....but I finally managed to sand em' enough to prime...
Primed
These were taking way to much time to prep, but I needed smooth so I sanded AGAIN!
Unfortunately, the second sanding was not any more successful. So what's a girl to do when Plan "A" fails?....Forget the plan and move on!!  
More sanding...
Still not smooth!
Since these were not going to be "love birds" I decided to make them Song Birds! I have seen lots of book pages, and music pages used for EVERYTHING on Pinterest, so that was the new plan....Here goes...
Old hymnal....love
Music lover
Song Birds need music so I grabbed my garage sale Hymnal and removed a few loose pages...found the glue, and got to work....


I mixed up some glue and water, tore some pages in small pieces, and put them in the bowl to soak. After a couple of minutes I started placing the page pieces on my new Song bird....repeat, repeat, repeat!
Just glue and water
Not sure yet...
Getting better...
After I finished covering the cuties, they looked too plain so what next!...Urethane!
Need a little something...
I expected the satin urethane to give a satin finish, but I got an unexpected surprise. The urethane accentuated each layer, and gave an antiqued look....I just love when I get Great Surprises!!! 
Still drying but lookin' good!
After drying they looked perfect. I'm lovin' the dollar tree! So here they are out for a day in the Spring sunshine...
My New Song Birds....


Now I am waiting for another free piano on CL so I can put my Song Birds to use.....NOT!! My husband is wonderful, but if I drag home another piano (yes I have done this before!), he will move to the garage (if he could find a spot :) !!!
Well, tell me what you think...Do you like the white version, the plain song birds, or the finished "aged" song birds? What have you made from the dollar tree?
I love all your comments, and look forward to hearing from you.....Have a blessed day!

Tuesday, December 27, 2011

Blue Redo

I hope ya'll had a wonderful Christmas!  Our family is so blessed to be able to share Christmas with all of you. Thanks to all of you for your kindness and support!
Do ya'll remember the  Lamp Revamp that I completed recently? Well I made a slight change and thought you may like to see it...let me know what you think. A couple of my other lamps (Yeah, I LOVE lamps), have been waiting in the garage. Unfortunately, one of them got bumped and broke...


Here is the lonely lamp
The lonely lamp's partner...Broken to pieces
Since the lamp was broken anyway,  I decided to "steal" the diffusers and use them for my favorite blue lamps! Of course, I had to take them apart again, but I think it is well worth it...Time to get started...
Love the lamps...hate the small bulb at bottom
I took the amber lamp apart, stole the diffuser and put it back together (I haven't completely decided what to do with this lamp...got any ideas?)
Next I took the blue lamps apart, which didn't take long since repetition has made me quite proficient at disassembling and reassembling lamps (and other stuff)!
It would have been nice, but not likely,  if the diffusers had fit...but no such luck! Luckily, my sweetheart of a husband just happened to be using his table saw (NO! not on one of my projects!). He cut one side, and voila....it fit! Now I put it all back together and here is the result....


No diffusers here
Can this little thing make a difference?
Diffused....like?
What a difference!


I also removed the teardrop crystals from the top (after a family vote). So, tell me what you think...Do you like the new look?  Help settle the "teardrop" debate....Yes or No to the teardrops....Let me know!


Linking up at theses fantastic parties...


shabby creek cottageThe Southern Product QueenA Crafty SoireeThe Shabby NestDays of Chalk and ChocolateOne Artsy Mama Lovely Crafty HomeRedouxBecolorfulThe DIY Show OffPhotobucketCraft & TellbuttonThursday Favorite Things five days five ways | feature friday free for allPartysq12