Shop Now!

Dresses from Shabby Apple

Blog Roll

Living SavvyPhotobucketPhotobucket beneath my heartMy Repurposed LifeWelcome to daily d !The Shabby Nest Decorchick! RedouxBecolorful crissy berry button180x150button

My Button!

Saturday, November 12, 2011

Counting My Blessings!

Hi Ya'll, it's me...a truly blessed mom, wife, daughter and friend! Sometimes I find it overwhelming to think of how blessed I am! I don't even have the words to express my thankfulness. So what brought all this on, besides the fact it is the time of year to be thankful?...It is my weekend to work, so not much DIY gets done...I am sleeping! (In case your new to my blog....I work nights...uugghhhh:) Well, while I was drifting in dreamland today, my sweet angel, Amelia decided to help me with a DIY craft...just so I would have something to blog about....How Sweet is That? Like I said....I am truly blessed. So here is her "candy treat"....
A Treat for Everyday in December
Amelia cut out a piece of cardboard, covered in in some shimmer fabric, and then taped on a colorful array of candy...She titled it "December Treats"....I love it, and I especially love that she did it for me!  Take time today to "Count Your Blessings...Name Them One by One".....I promise you that 1 day will not be enough if you start counting. God bless you all as much as I am blessed...Now the creator herself would like to say a word...or two....Take it Amelia:
Wow, thanks Mom. It was soooo much fun to make my December Treats so I couldn't even think of it as a "project"... it was too  much fun. Oh, if just a little creation like my treat calendar can bring on such a reaction I'm gonna have to go into a bigger " business" here.     God Bless,AJ
Aint she cute?....Until tomorrow,

Friday, November 11, 2011

Leftovers!

Hi Ya'll, what a busy week!
I have been working (nights), trying to finish projects, making wreaths, painting, lovin' on my family, and trying to figure out the technical side of Blogging!  I hope ya'll liked the wreaths....so much fun to make (and eat). I bought too much candy though, so while I was at Target (one of my favorite stores), I saw these adorable buckets...only $1! Now I have a cute way to put out all my leftover candy. So cute! Just what I need...more candy:( 
I have been busy linking up to parties, and I am so impressed with all the talent out there....hope to meet more of you soon.
My helper and partner in decor is my sweet daughter Amelia, and she would like to "guest" blog a little, so I said....SURE....Here she is:

Thanks mom...I have to disagree...we do need more candy. I absolutely love Target and I always have to check out the $1 aisle.  It was pure luck when we found those adorable little buckets, but I think I am the luckiest... I found a positively perfect little turquoise bucket with a snowman on it. That one went into my room. And I also have to say... It rocks to be my Mother's helper and  I think I love doing the projects at least half as much as she does. Veg out, AJ
Thursday, November 10, 2011

Edible Wreath

Hi ya'll, get your coffee and come on in....
I was strolling through my local dollar tree and I spotted some plain green wreaths (don't you just love the dollar tree?). I've been planning to make a wreath like I did when I was a kid...a candy wreath! Way back when...we used a wire coat hanger, string and candy. Getting the coat hanger into a circular shape wasn't much fun, and now the hangers are much thinner, and hard to find. This $1 wreath has a sturdy wire frame and the branches give it some thickness, so it is perfect for our candy wreath. Wanna make one too?....Follow along...
Peppermint Wreath
Multi-colored Candy Wreath

Here is the supply list and the cost breakdown:
  • Dollar tree wreath ($1)
  • Dollar tree wreath hanger ($1)
  • Peppermints, or whatever wrapped candy you like (Walgreens has different colors for under $2) $12 for 7 bags
  • String (not to thick) $0...had on hand
  • Kid scissors ($3...if you don't have a dozen on hand, like me) 
  • Bow(optional) $0...made from ribbon on hand
  • Stretchy cord (to hang your scissors) $0...We have boxes of this stuff!
  • TOTAL Cost to Me.....$8 per wreath (with lots of candy left over)
Photobucket
Stuff to get started!
Now you just have to cut a piece of string about 6-8" and tie it around the wreath, making a knot....Pick a piece of candy and tie another knot around one end of the candy wrapper, securing the candy to the wreath.  You can cut the string ends off for a polished look or you can leave some hanging for a country look....Repeat, Repeat, Repeat....
Amelia is the BEST helper
She's fast too!
After finishing your wreath (you can do just the front, or front and back), add a bow and a "stretchy string" to hang your kid scissors....ALL DONE!!!  (Watch out...put a daily limit for each family member, or the wreath will be gone in a blink!) YUMMY!!!
You could do a butterscotch wreath for Thanksgiving, or a "smartie" wreath for baby showers...so much texture and the pastel is perfect. What other ideas do you have?

Comment and let me know how you and your family like this edible wreath...I super appreciate any comments or followers :0


Enjoy, and see you soon...


Monday, November 7, 2011

Picking up "Sticks"

Hi Ya'll, come on in...
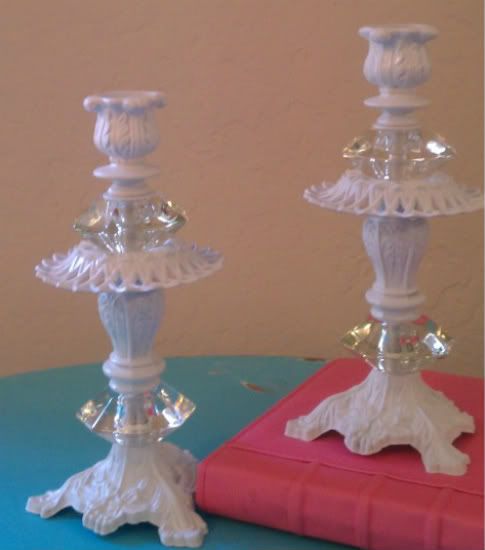
I went to garage sales this weekend and WOW....lots of great projects finds for our new home. I picked up some "sticks" (just need the candles)....now check out the transformation by rolling your mouse over the picture below (Thanks to Kristi @ www.addicted2decorating.com  for this great blogger hint)


Now check out the process...
Photobucket
Take apart...Clean....Prime

Painted with 3 coats Rustoleum after cleaning...
Photobucket
Ready to Reassemble
Photobucket
What do you think?
The total cost of the project was $1...I had the primer and paint on hand.
Tell me what you think...I love comments!
Sunday's Best Linky Party!

Sunday, November 6, 2011

Oil and Water don't Mix

Hi Ya'll,
Welcome to Bleak 2 Unique. My special thanks to Tenille Gates at TCBOTB for her hard work...She is truly fabulous!
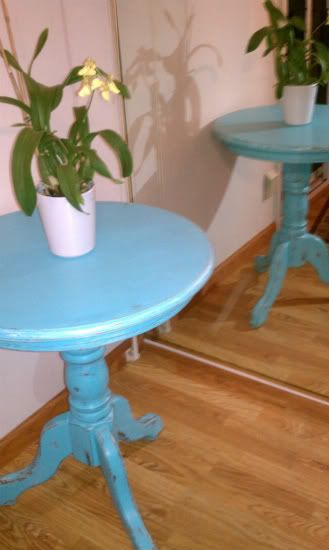
While waiting for the makeover it crossed my mind to take a few days off...HA-HA!! However, I did manage to finish a project, (a project NOT involving recovering parts of my blog). Here is my new chalk-paint table for the screened in porch, and my very first "before and after"..... (mouse over photo)


Well, that is the "before and after", but now you get the rest of the story.....WARNING!!!!....
I took a lot of pics, so if you want to get the whole experience, (almost in real time), keep reading for a detailed start to finish makeover, and a messy chalk paint recipe. Try not to laugh at my recipe...I just try stuff...and it worked (In my younger days I mixed bleach and ammonia to clean the bathtub...NOT a good idea, I should have read the warning label).

First I gathered all my supplies:
Lightweight Spackling
Urethane
Whizz rollers
PURDY brush
Photobucket
Flat Paint
I found several chalk paint recipes online, but not many for furniture, so what's a girl to do?...Make something up!....My initial chalk recipe was:
  • 1 cup flat paint
  • 2 1/2 Tbs lightweight spackling
  • 1 1/4 Tbs satin urethane
Mix well...it is thick and doesn't look like very much paint, but it goes a long way. Be careful not to step in the utensils you used.....like me!?!
Photobucket
Makin' messes!
This paint did not go on smoothly and the whizz rollers were not affective (too sticky). I had terrible brush marks, and I was getting worried...
Photobucket
Prominent brush strokes
Although I was not happy with the existing finish, I decided to try sanding....and sanding...and sanding. The table got sanded, but so did my thumb...OUCH!
Photobucket
Ouch!
Photobucket
Not liking this too much
I didn't really like the look of this paint finish...maybe too much destressing, but I decided I wanted it blue anyway. So, do I go to the store and buy some flat blue paint?....NO! I have some perfectly good satin blue that would do just fine if I mixed it with a little of the flat white...(this is when the little voice was yelling...NO, but I didn't listen).....The new chalk paint recipe went something like this:0
  • 1 cup white flat paint
  • 1 cup, more or less, blue satin paint
  • 5 Tbs lightweight spackling
  • 2 1/2 Tbs satin urethane
I had a lot more paint this time! (You really don't need this much unless you are doing a very large piece). This batch went on about the same, but that is where the similarities end. The blue was a definite improvment....don't you think?
Photobucket
Blue is Better
 Then I started sanding....the new chalk paint recipe did not sand into chalk like the original batch. The paint was "gummy" in some places and "rolled" up when I tried to sand, so I had to sand gently.
Photobucket
"Gummy" spots....YUK!
The only left to do after getting a smooth finish.....Distress!
Photobucket
More distressing
Photobucket
Sanded edges
Last thing to do was to wax.....then enjoy!
Photobucket
Wax it!
Photobucket
Enjoy!
Although I really love the end result, I don't know how well this "original" chalk paint will hold up....It was tough to sand, so I am hoping it will stand the test of time. Also, I have to warn you that the clean up is horrific! The urethane only cleans up with mineral spirits and the latex cleans up with water....Did you know that oil and water don't mix? I won't bore you with the details, but it was an oily mess. The end product was worth it for me, but I wouldn't recommend that paint recipe. Thank you for joining me on my first "start to finish" blog....any questions? I love comments!!!

Tuesday, November 1, 2011

More Chairs

Hi Ya'll! Well I have made the BIG decision....I'm going to pay...uuuuggggghhhhh, to have a blog design! I have put this off, but I am spending more time trying to maintain and improve my site, than I am on my fun work! BLEAK 2 UNIQUE will make its debut in a few days...Until then, here are a few pics of my latest finds (and future projects). My sweet husband just took a load of "stuff" to Alabama, and I could not stand the empty space in the garage...C U at the Debut, Lori

So cute...Probably for the screened in porch....What color?

A "sister" cane chair so my other one won't be lonely

Did I mention....I like chairs?