


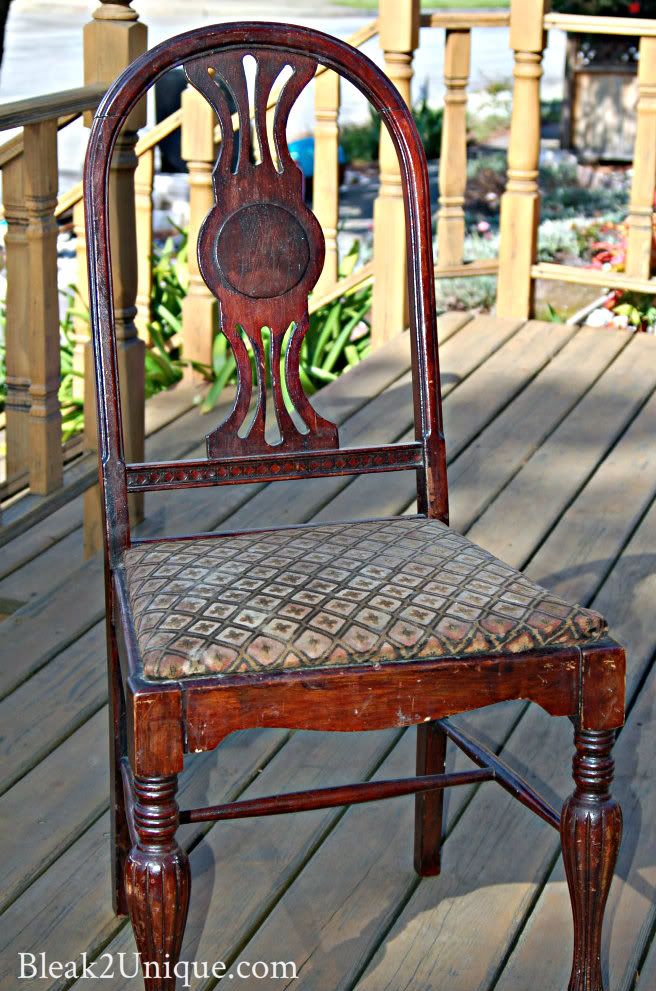
Hey y'all! In case you missed it I was a guest over at "Project Queen". I had so much fun sharing with Mandy and all her followers. So, what did I share? My first chair makeover..... I have at least a dozen chairs stored here and there, but I finally got busy and fixed one up. This is one of three chairs that I picked up for FREE on Craigslist...gotta love CL. Unfortunately, I couldn't decide what to do with em' , and so they sat in the garage forevvver. Then it occurred to me that I didn't have to make a final decision....I could keep my options open by just tackling one, and see if I like it. Liking a lot of different styles can make it hard to make a decor decision sometimes...do y'all have that problem? Finally motivated to get moving, here is where I started...
She had a few "dings", and I hate to sand, so out came the homemade chalk paint. Don't get me wrong, I love Annie's chalk paint, but since I have a budget I make my own...
and you can too....you can get the recipe HERE.
After removing the seat and tightening up all the screws, I brushed on the first coat...
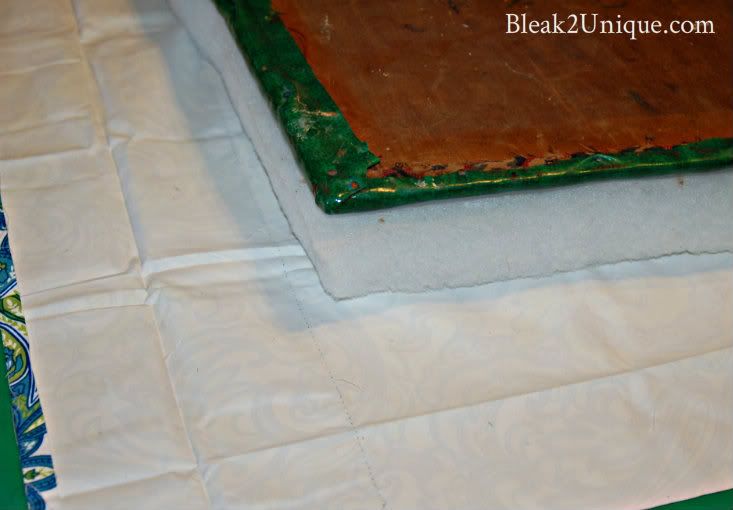
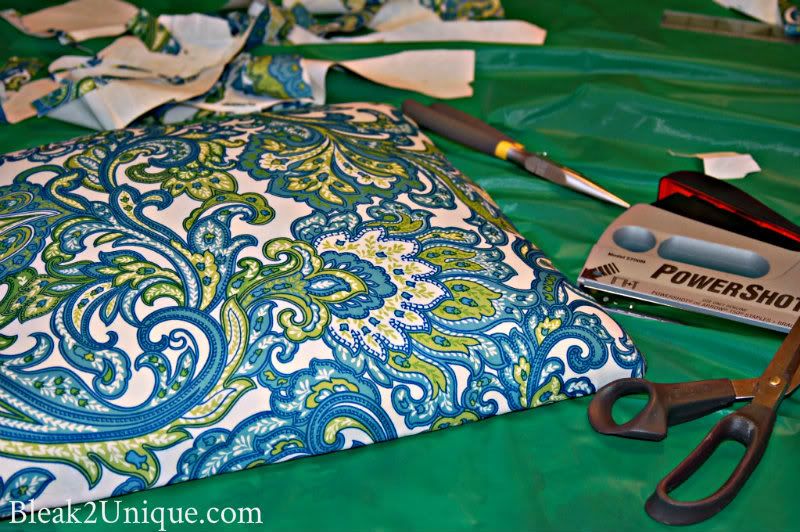
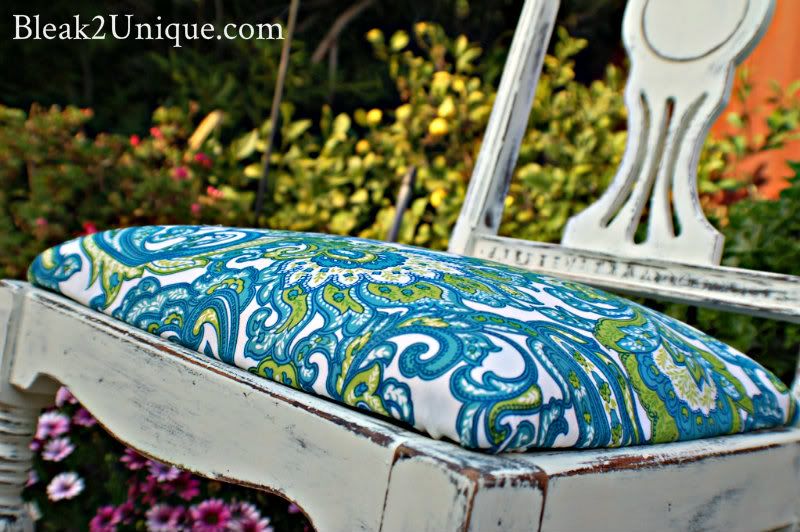
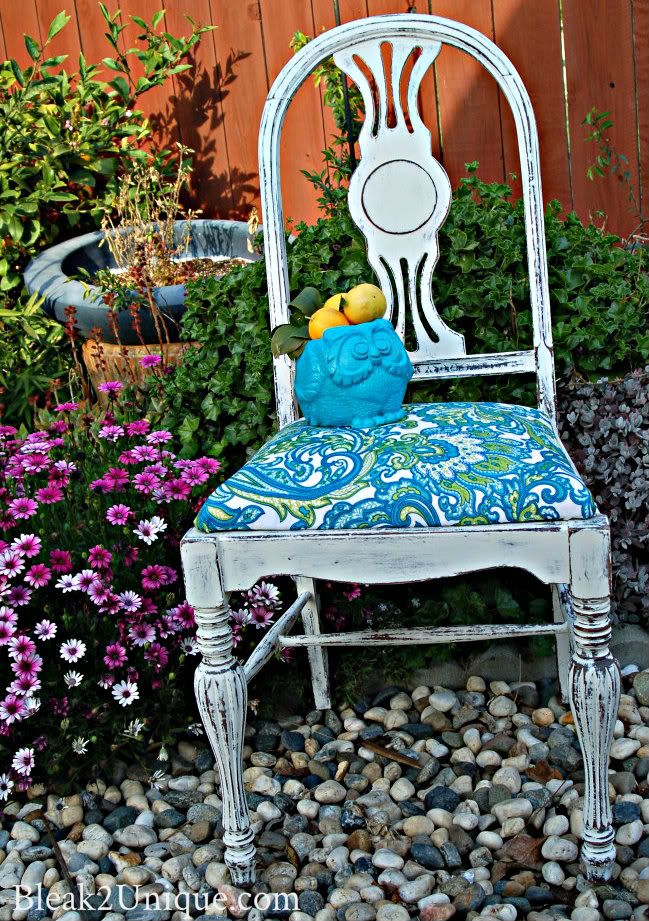
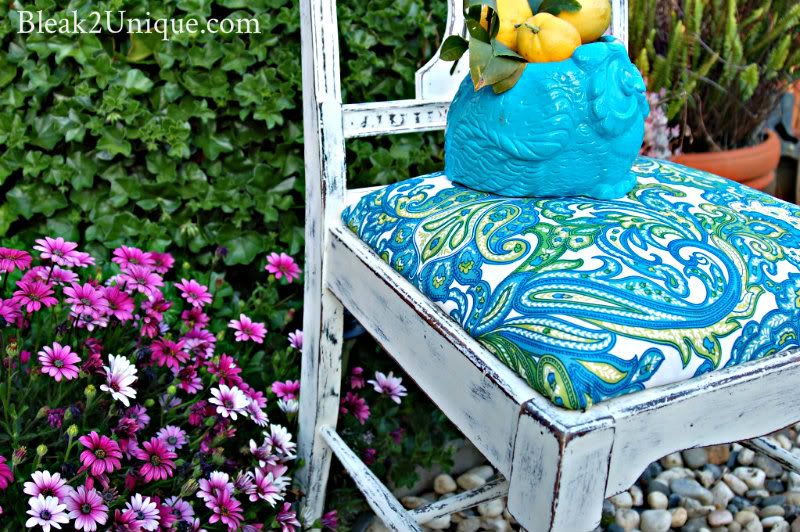
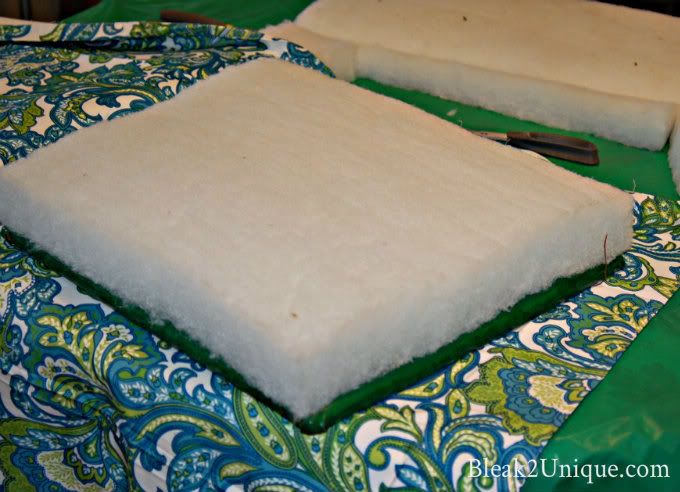
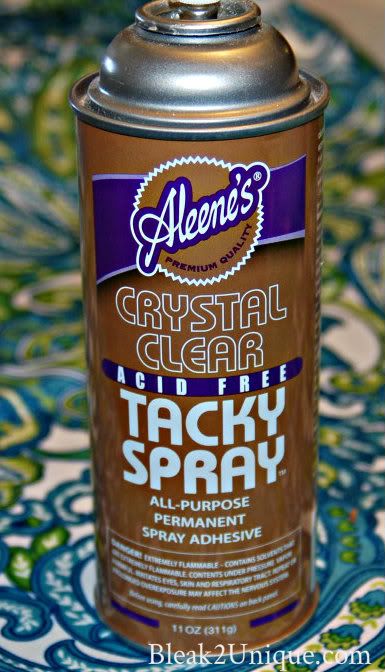
While the chair dries, I worked on the new seat. Recently I found a curtain, and the fabric was just what I was looking for...bright, bold, and durable (the lining makes it heavier). The cushion was left over from another project, so I just cut it to fit and secured it with spray adhesive...like this...
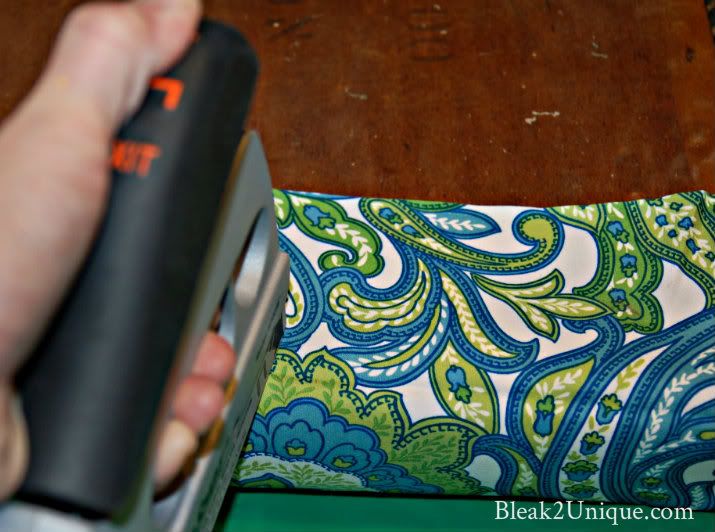
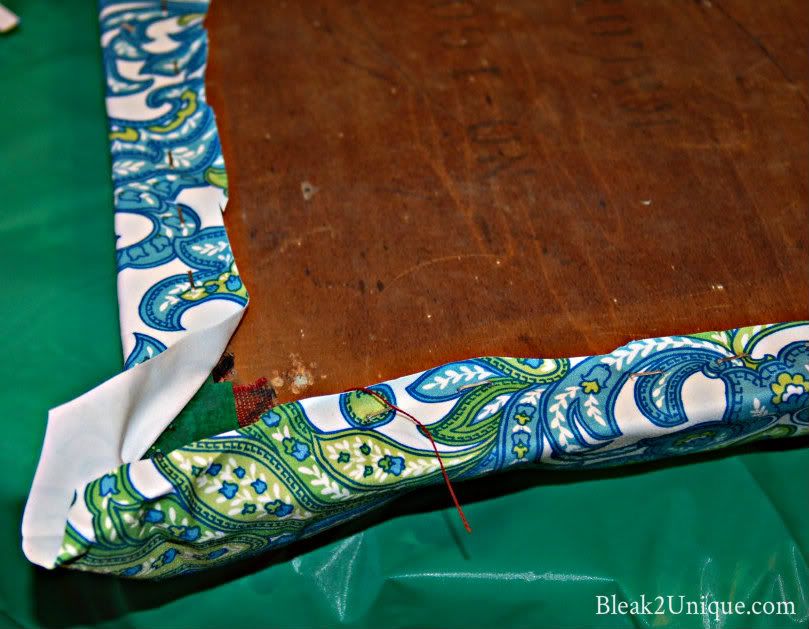
I used the seat as a template and cut the fabric leaving a six inch border. There was quite a bit of extra fabric to cut off, but too much is better than not enough, right? To finish off the seat I stapled each side in the middle...pulling tight, and working out to the corners.
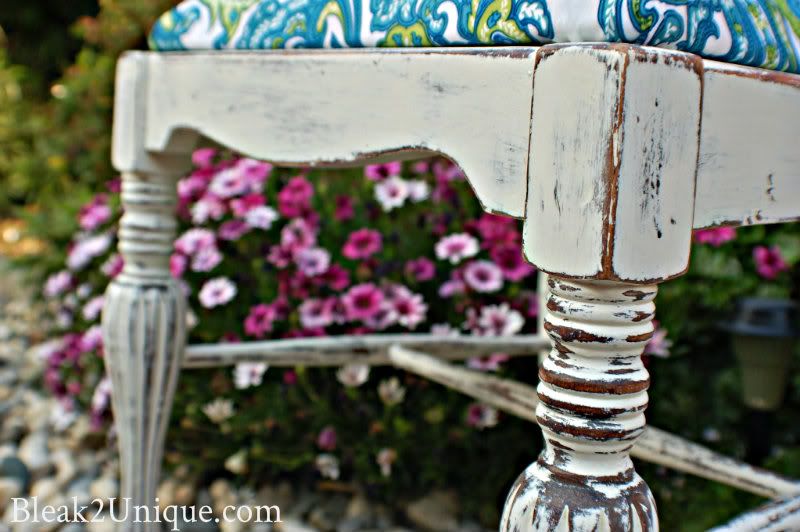
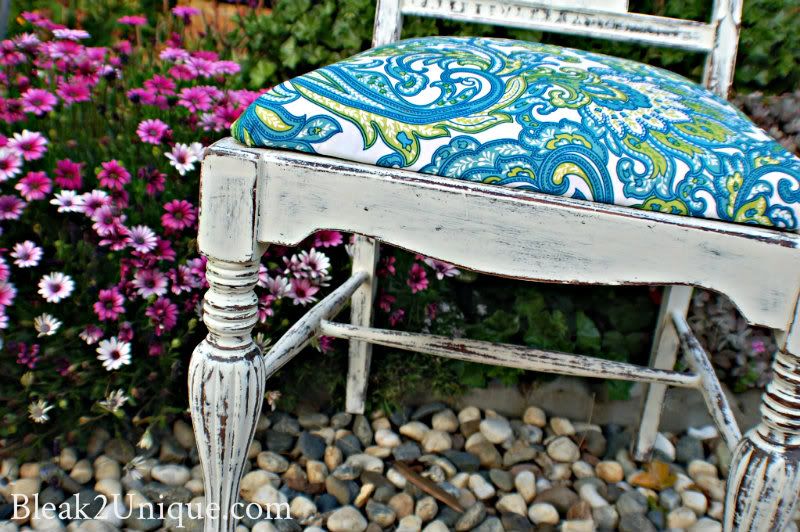
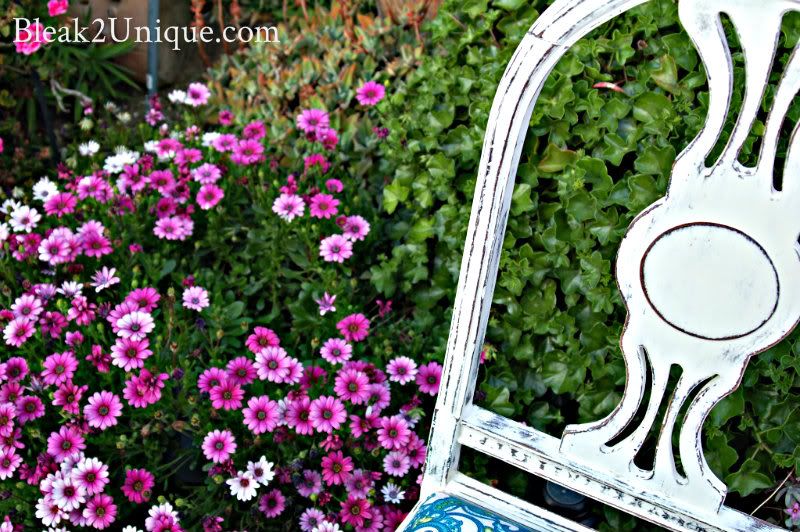
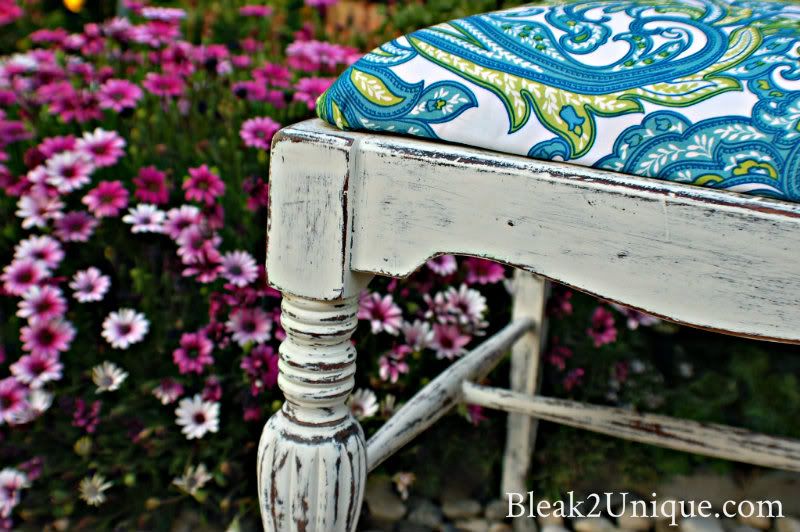
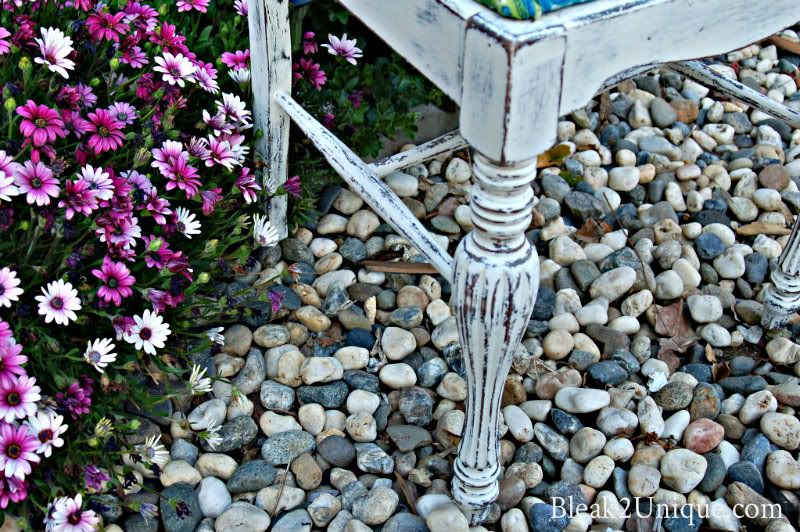
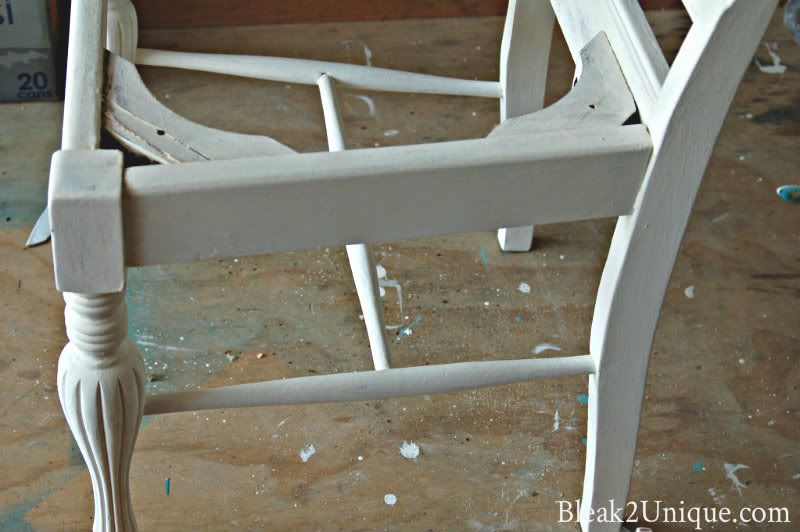
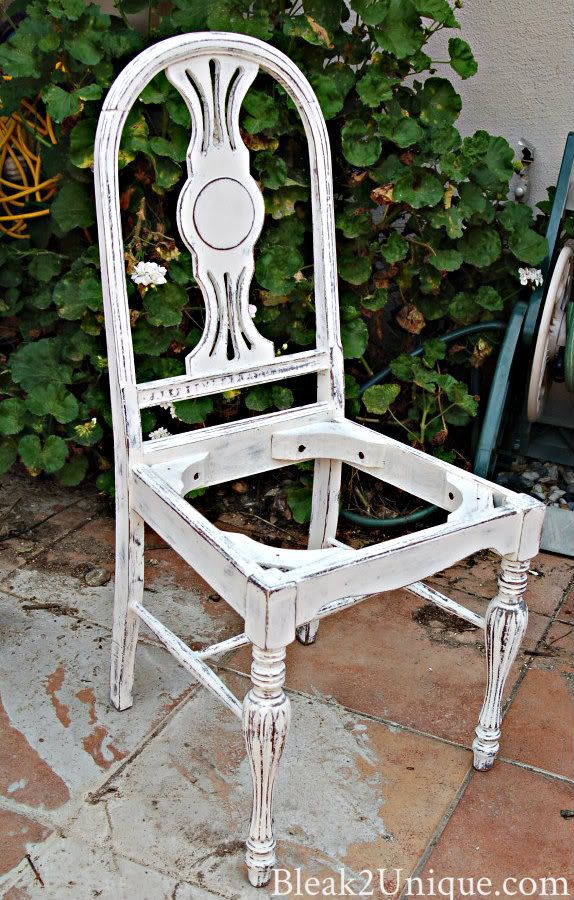
 Once the seat was finished I got back to the chair. Usually I just distress pieces a little bit, but on this project I wanted to try a more distressed look. I sanded, sanded some more and then finished up with a coat of wax...
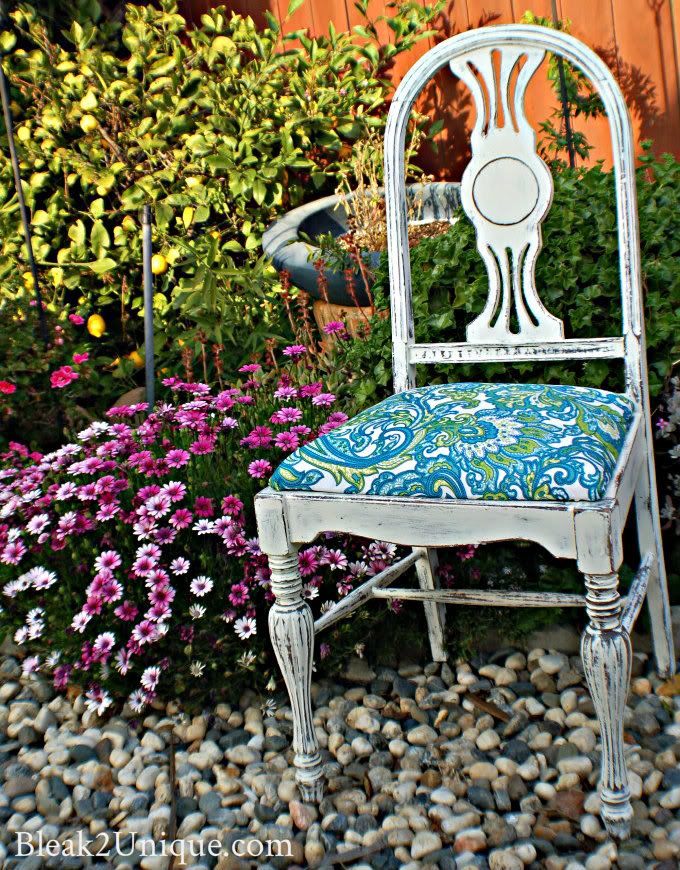
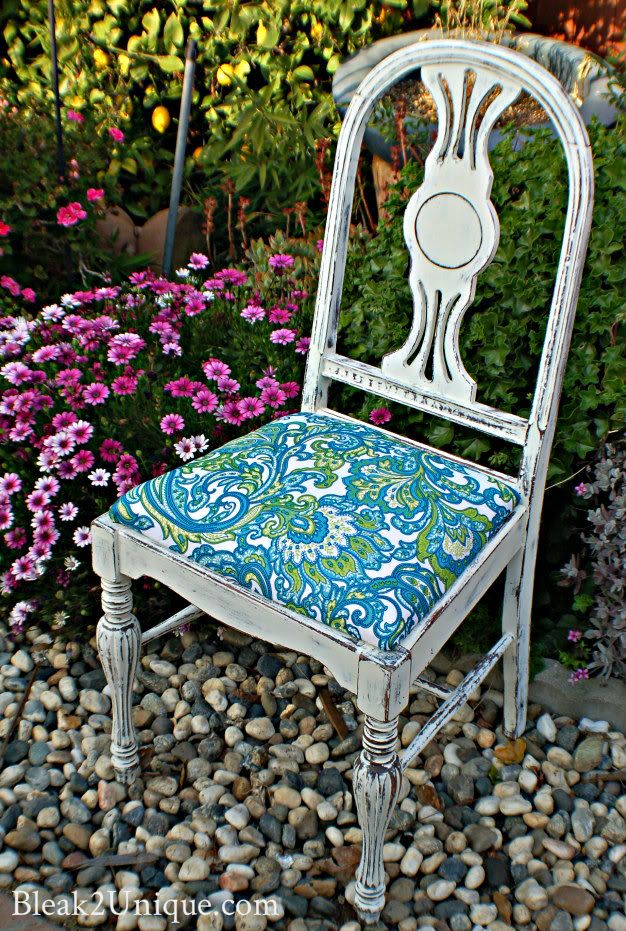
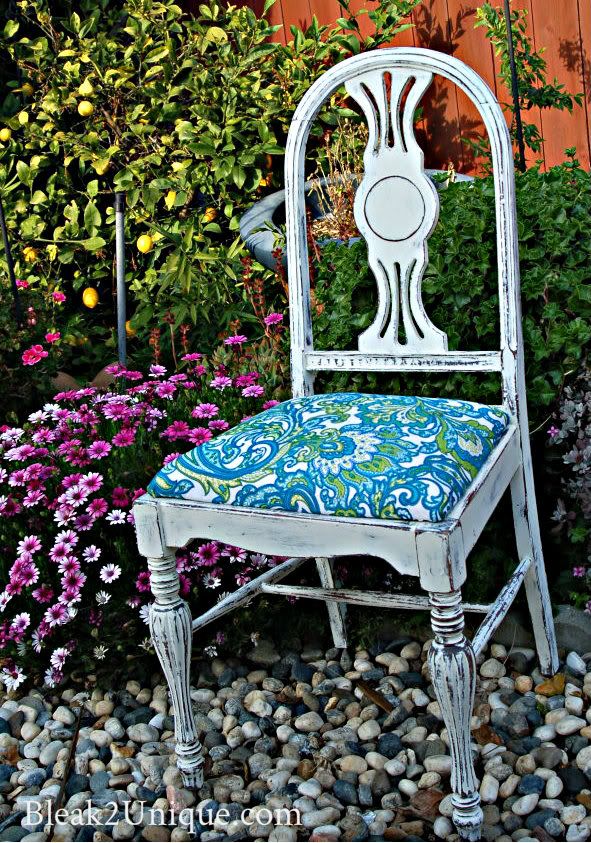
The only step left....put her together and take her picture.....Here she is..."Paisley Love". Tell me what you think...I really do love hearing from all of you! One down, two to go, so give your input on the other two...same?, different? change this one?...Just share!


 Thanks for visiting....I love hearing from y'all so share your thoughts....
Linking up to these fabulous parties
:


![]()


![]()


 |
| A little dirty and beat up...but cute |
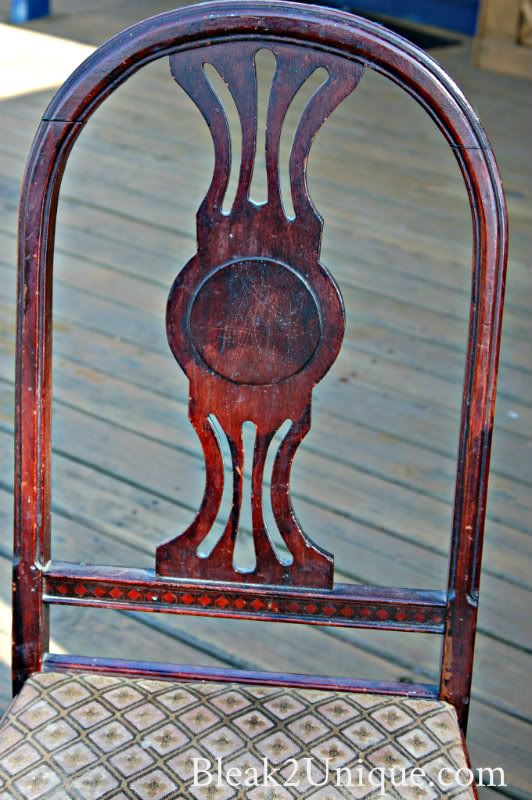 |
| Great details |
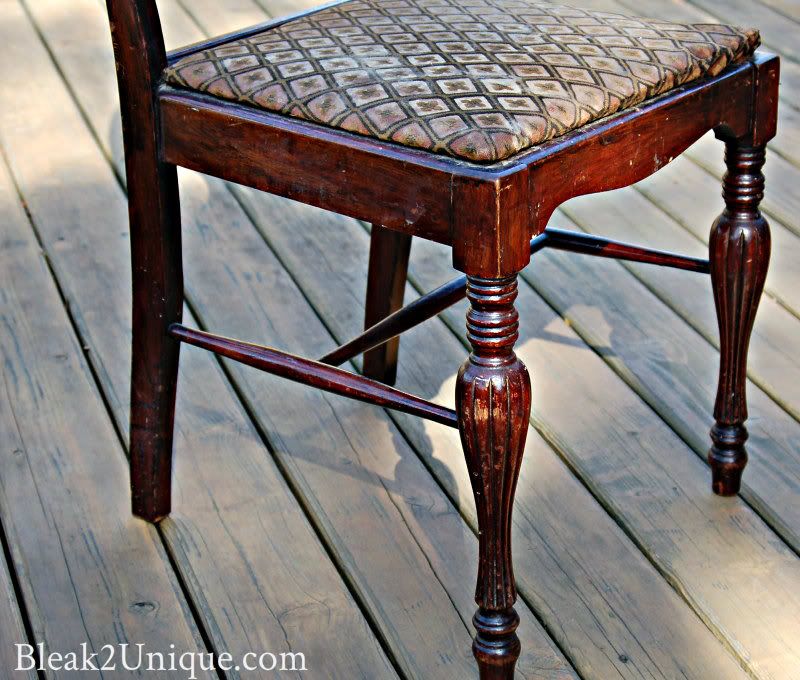 |
| Nice legs |
and you can too....you can get the recipe HERE.
After removing the seat and tightening up all the screws, I brushed on the first coat...
 |
| Needs more cleaning |
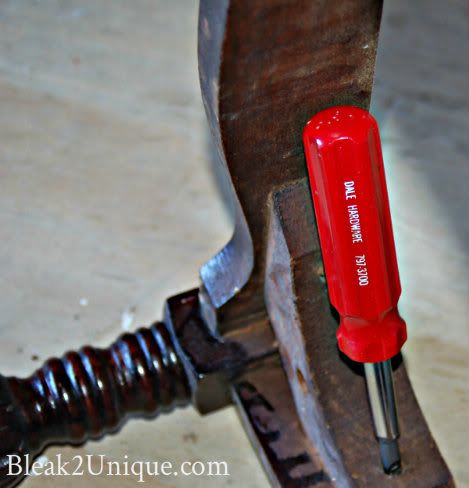 |
| Screws tightened |
 |
| First coat on |
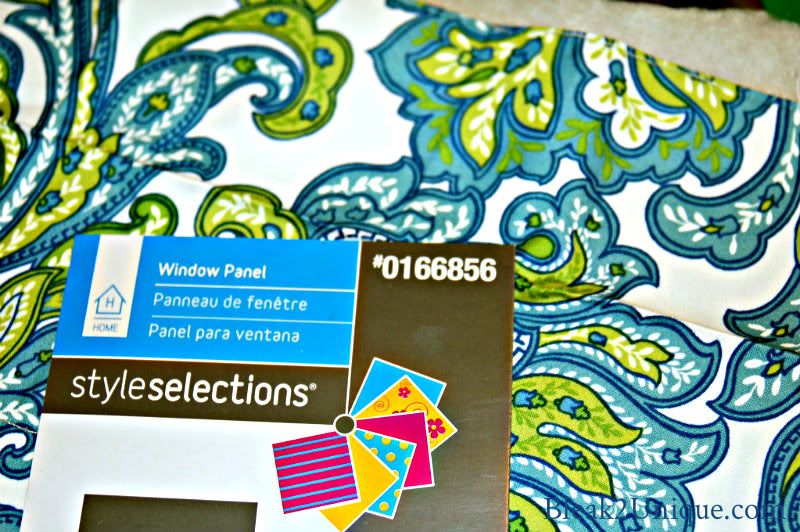 |
| Love this fabric |
 |
| Cushion cut |
 |
| Spray and press...done! |
 |
| Distressed |
Linking up to these fabulous parties
:


51 comments:
Beautiful. What a wonderful transformation, thanks for sharing.
LOVE IT !!!!
Wonderful post , photos a job ! Have a great day !
Beautiful transformation! Love the fabric you chose!
It's adorable!! I love the distressing! The homemade chalk paint looks just like the real thing- I might need to try it! :)
Lori, you are definitely right smack dab in the middle of your calling!
I love the distressing, and just the title "Paisley" made me want to read this post ;)
That chair is so perfect!
~Lisha
I just love this chair! I love the transformation, the style, the wonderful slat back and the fabric. Great find and great job!
The chair turned out so pretty, love the choice of fabric!
This looks so good! Love the fabric! -Jessica
Hi Lori - love the chair. You would never know where it started. And thanks for the tutorial on the home made chalk paint. I'm NOT paying the prices for ASCP, plus it's hard to get here in Canada. I'm off to the hardware store for some plaster of paris. Who knew?
Beautiful!! What a difference a little paint and a new cushion makes!
Beautiful job!
So cute! I love the fabric that you chose! Personally I'm a crisp white finish type of person, so I would have distressed a little less but it still looks great!
Love the fabric, it's so fun! I've been in a modern-paint-it-neon-green-phase lately, so I'm not the one to ask about distressing:)
Jessica
stayathomeista.com
Beautiful job! I love the new distressed color and that you made your own paint and the fabric is gorgeous! Love it!
Okay -- that is GORGEOUS! What a transformation. I love the white mixed with the blue. Perfection! :-)
Wow, you did a great job, I love it! (and you cant beat free!!) Thanks for the chalk paint recipe!
nice job. i like paisley also. following .. Linda
viagra buy australia generic buy online order viagra http://viagrapharmacyfd.com#5582 legal buy viagra uk [url=http://viagrapharmacyfd.com#1272]Viagra[/url] try before you buy viagra
I really like that fabric. I love paisley. Your redo really looks great.
Gorgeous!!! Such eye candy!! you did a great job.
You really breathed new life into that chair! Great job!
Jill
www.zazzypeacockstudios.blogspot.com
Love this post. Would love for you to share on Simple & Sweet Fridays. Have a great weekend!
Jody
What a great makeover! Your chair has come to life!
I love the fabric that you used! Against the white painted chair it really pops!
I love the fabric that you used! Against the white painted chair it really pops!
Swooning over this chair! Would love for you to stop by and link up to the Pomp Party!
http://jill-createcraftlove.blogspot.com/2012/04/pomp-party-15.html
Jill @ Create.Craft.Love.
love the distressed look! the fabric looks great on here!
Hey Lori! I am giving you the Yostie Blog Award today because you ROCK! :)
~Lisha
Beautiful job, Lori! Love the fabric and the extra distressing. Perfect. :-)
Great project...it looks so nice.
This is a stunning transformation!! I am a new follower, and love to redo furniture too--I hope you can stop by my blog sometime:)
Shannon@SewSweetCottage
Love it! The distressing really brings out the details and the fabric is so cheery!
I love everything about the transformation!! I would love for you to share this with my "Unveil Your Genius" link party (new party every Thursday).
http://taylornorris.blogspot.com/2012/04/unveil-your-genius-link-party-8.html
Happy Sunday!
This is stunning. I love everything about it .... The distressed look, the fabric color and pattern. It's beautiful. Thanks so much for sharing st Fabulous Friday.
Love the fabric and the details on the chair! A sweet transformation!
Thanks for sharing on Simple & Sweet Fridays. Love how the chair turned out!
Jody
What a great job you did!! I've always loved paisley and in fact almost named my daughter that!! You're chair is so pretty. Thanks for sharing!!
Hugs Giggles
A great transformation, I love the legs on the chair. I am such a leg girl! Also really like the paisley material you choose, so very pretty. Congrats on hosting on Project Queen! Thanks for sharing your creative inspiration over at Sunday's Best!
Found you by way of The Southern Institute! I LOVE this!!! Now I want to find an old chair and make one for my desk!!! I LOVE paisley patterns too!!
Amber
recipeswelove.net
what a great find! i love the shape of this chair! and love that fabric!
hi Lori,
i was going to choose you as one of the features for this week, however i realize you are not yet linking back to the link party at http://www.finecraftguild.com/
could you please do so. thank you so much,
Rose
Well lady I love it! I just bought a $10 chair from a local antique shop to paint pink for my craft room! Yours is fabulous! Thanks for sharing at Show & Share! I'll be featuring this in tomorrow's party!
Great transformation! That fabric is beautiful!
I featured you today!
http://www.herecomesthesun-kelly.blogspot.com/2012/05/fabulous-friday-24.html
Lori, I love your chair makeover. I'm in love with the lines in the back of your chair. AND what cute fabric (errr I mean curtains) to use for the seat! Thanks for sharing your talent in the DIY Talent Parade!
Beautiful transformation! Love the fabric you chose - fun + colorful!
Beautiful, I love love the fabric
Very cute. What a difference. My opinion: do the next one differently--maybe distress it in a similar way, but use a different fabric on the seat--maybe a sunny yellow print? You could use/sell them together still, but each one would be unique.
I've been wanting to use some chalk paint on a couple of projects, but everyone who has blogged about doing it mentions waxing afterward. Could you PLEASE respond and tell me what wax to use? I don't think the Ann Sloan paint will fit into my budget right now, so I hope to be able to use something less expensive and more accessible where I live. Thanks.
CASHEL1916@yahoo.com
OOOOps--sorry to have 3 posts all identical. What I meant so say was I really don't feel I can afford the Ann Sloan WAX, so could you please suggest something more affordable and easily accessible. Thanks. Cashel1916@yahoo.com
Post a Comment