


Recently I was a guest on My Repurposed Life...WOW!!!
Thanks so much Gail for having me over, and letting me share my latest creation...Southern Blue Belles.
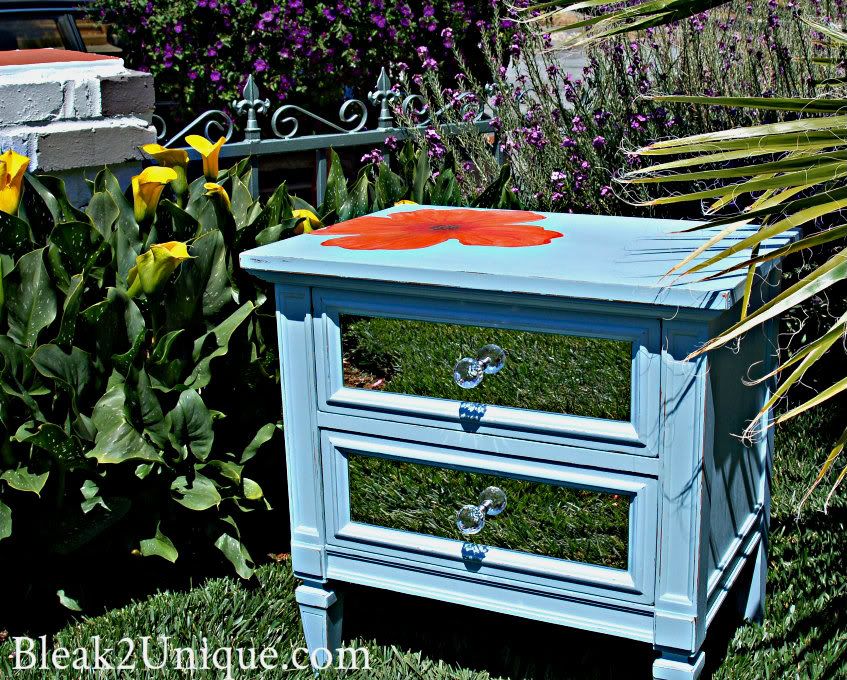
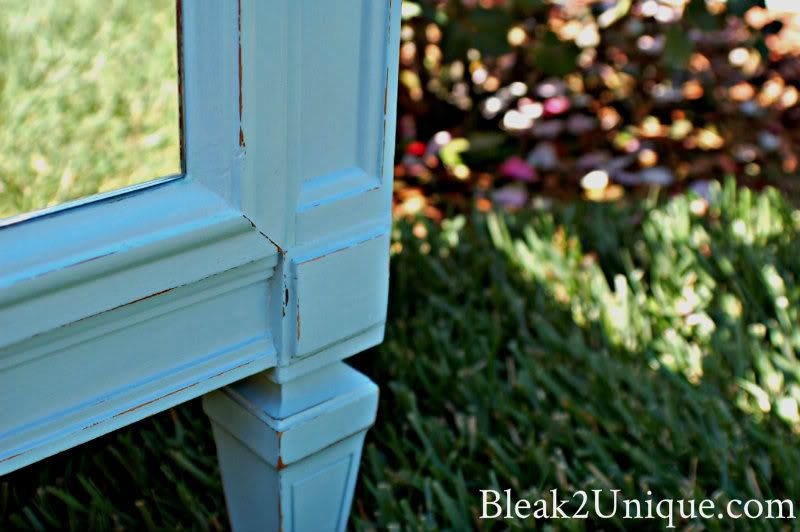
I scored these two vintage beauties at a garage sale for only $5 each, and I fell in love. It took about 6 months to come up with a plan, but I finally decided on distressed blue, with a little bit of glam. I always start with a plan, but you know what they say about the best laid plans...
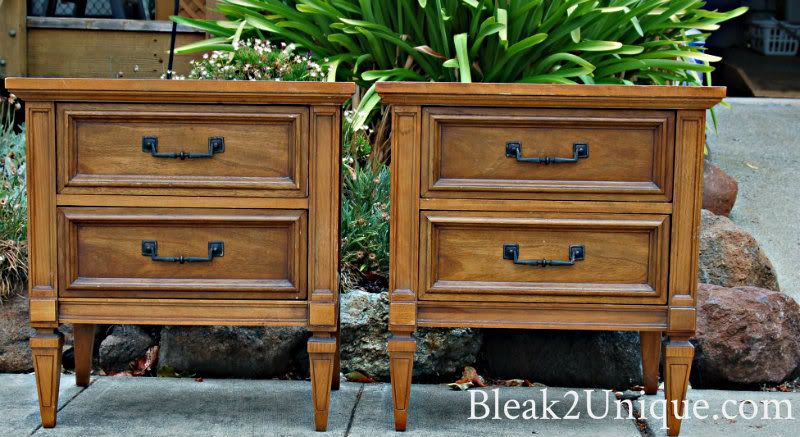
Picking a color is always troublesome for me, but I finally settled on a one of the Historic Preservation colors from Valspar... Oatlands Dainty Blue. At some point I really need to choose a color other than blue...maybe next time!

Next I got the rest of my supplies together to make up a batch of Paris paint, (my version of Annie Sloan chalk paint). I do love the original "Chalk" paint, but I am a DIYer at heart, and mine is super easy to make. Wanna try it? You can get the recipe HERE.
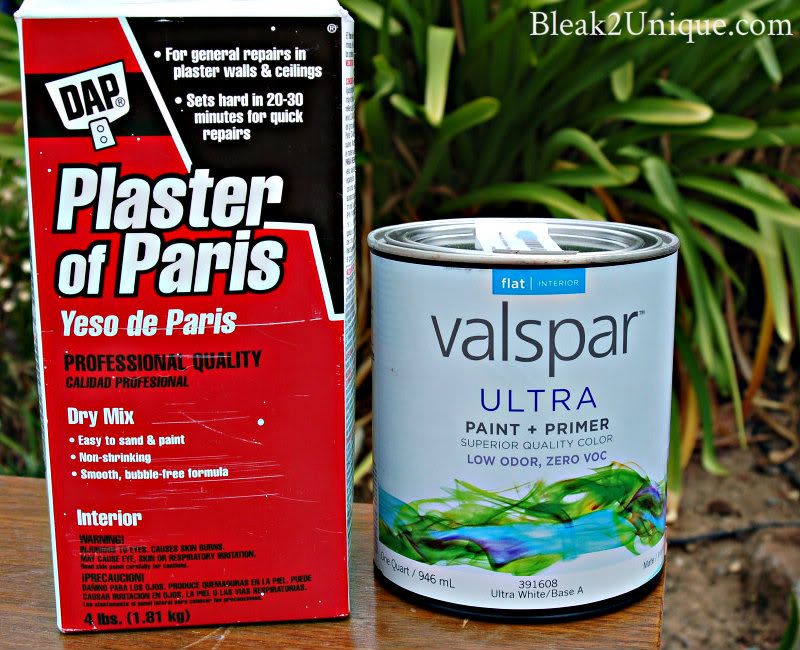 |
| Plaster of Paris + flat paint = Paris paint |
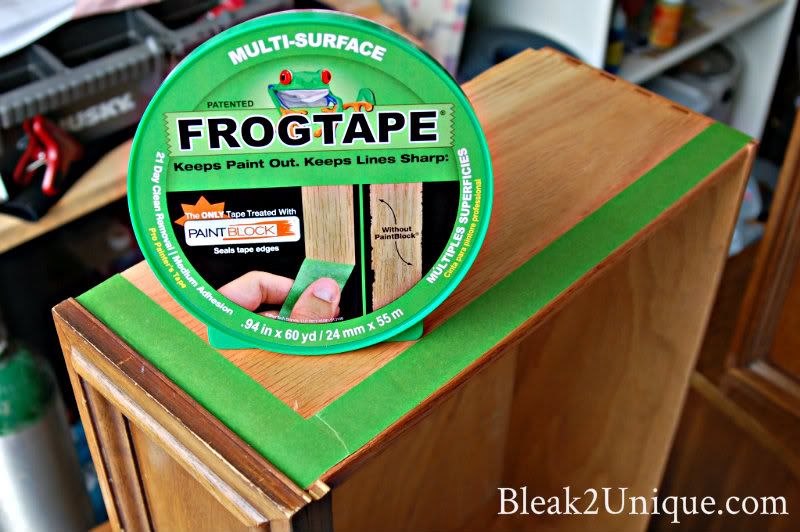
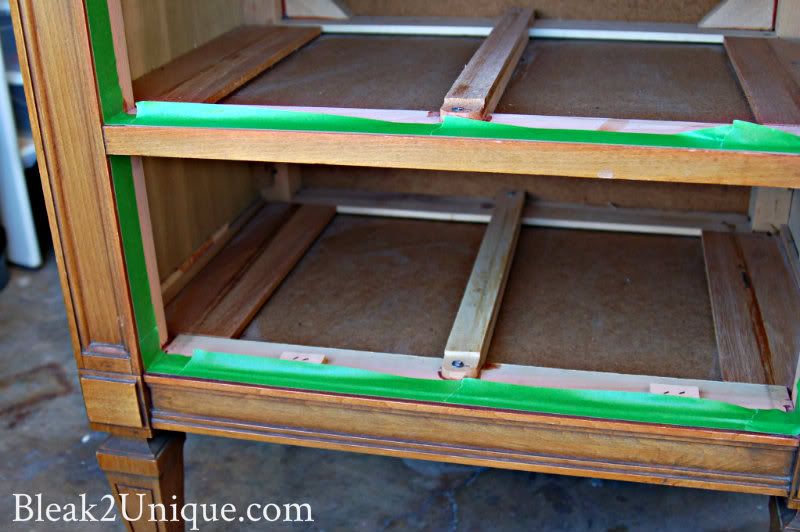
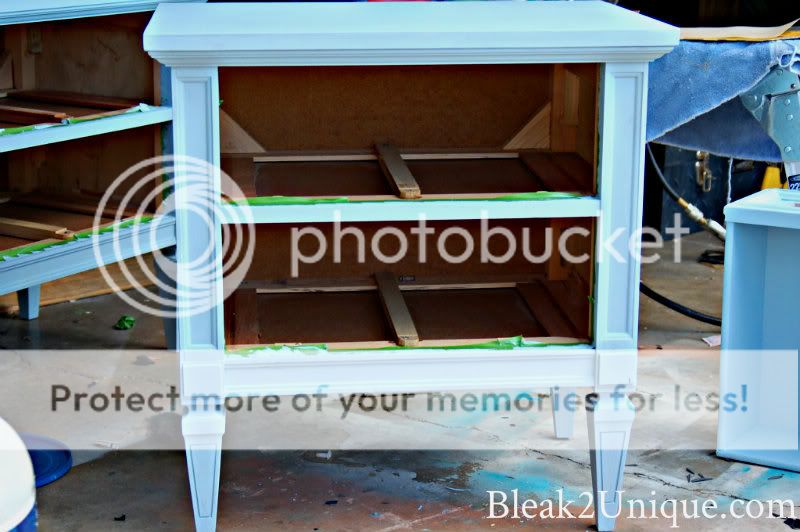
The great thing about Paris paint is that you don't have any prep work...just paint, sand and wax. Gotta love that! I didn't want to paint all of the inside, so I grabbed my Frog tape to ensure straight lines...
Once everything was taped I grabbed my brush and got busy painting. The Paris paint will have brush marks, but no need to worry, the sanding takes care of it.
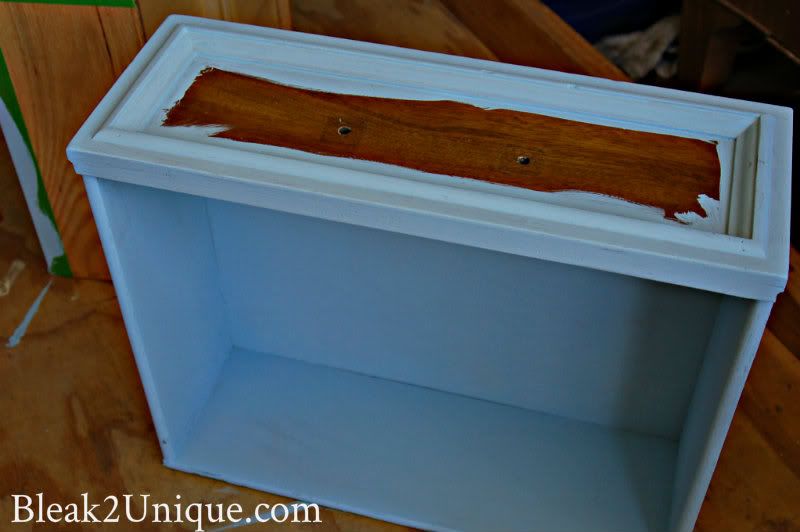
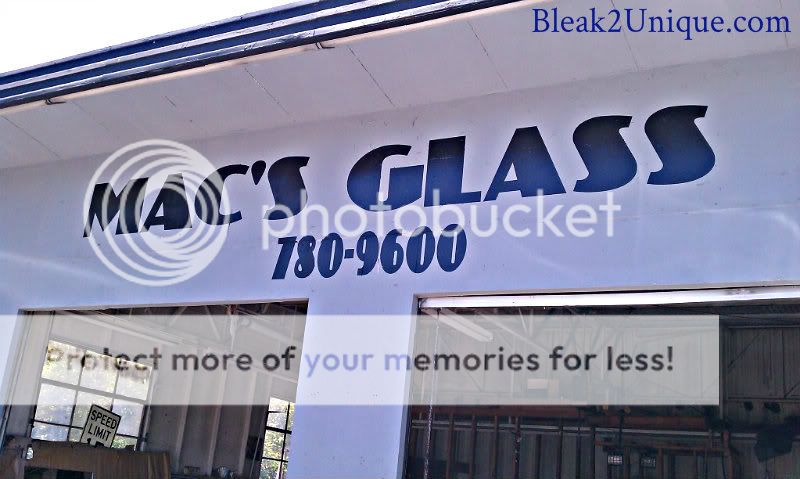
I left the center of the drawer face unpainted so I could add a little glam. While the paint was drying I headed over to Mac's...
 |
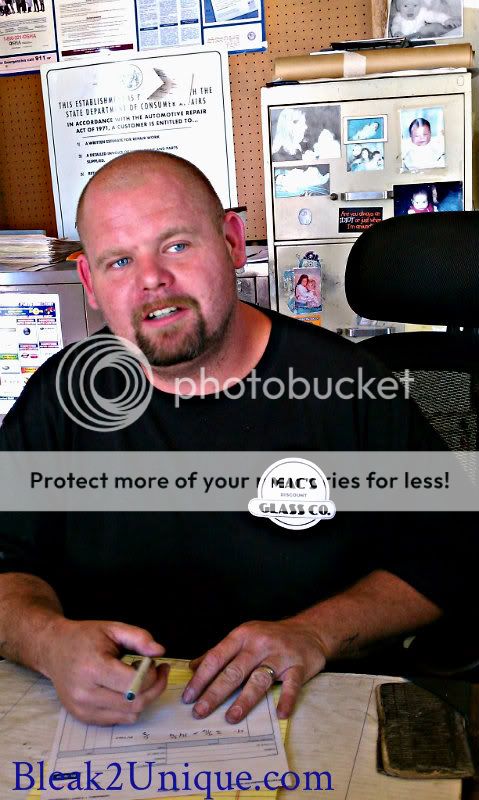 |
If you live in the bay area and you need glass cut this is the guy to see....thanks Mac! I got 4 mirror panels for my drawer fronts for $20, and he had them ready the next day. Mac...your the man!
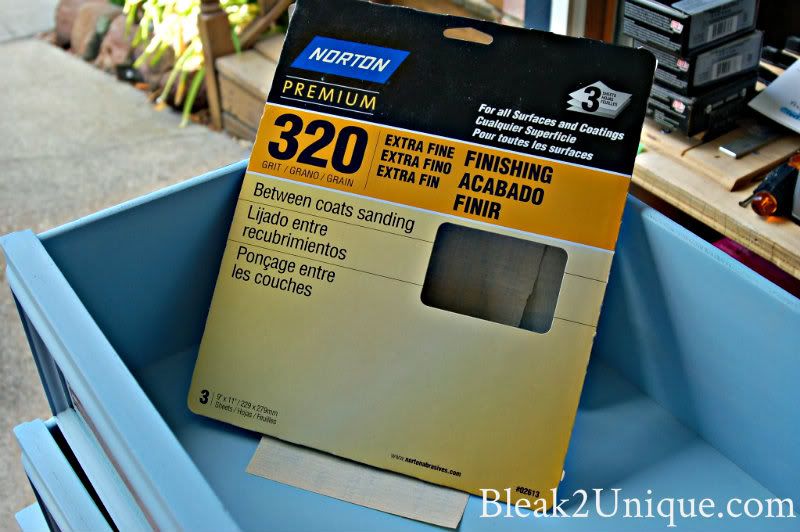
I set the mirrors aside for later and started the sanding process...NOT my favorite thing to do, but the Paris paint makes it easier. For the smoothest finish I used a fine sandpaper...
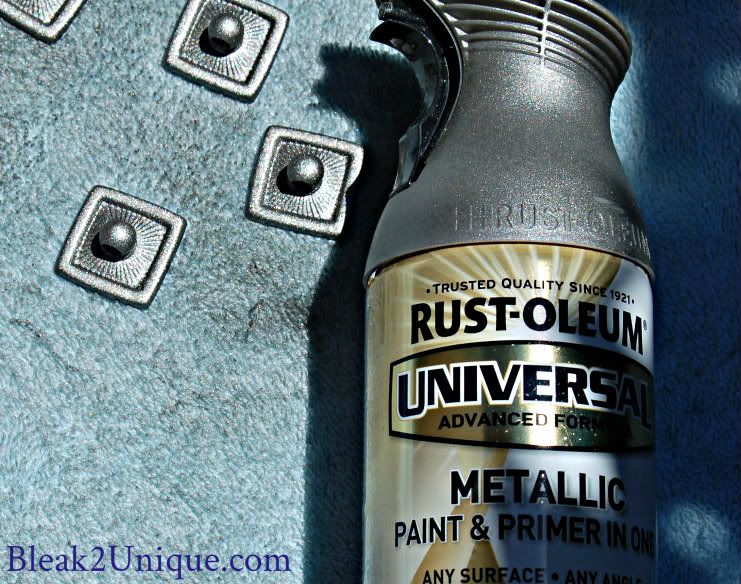
I spent the next few hours preparing my drawer pulls. Since I opted for the "no hole" version of mirrors, I needed to have pulls that were flat...out comes the hack saw...

I would not recommend this...it was tedious and exhausting work to cut all eight of these posts off. Next I painted them with a satin nickel finish from Rustoleum...
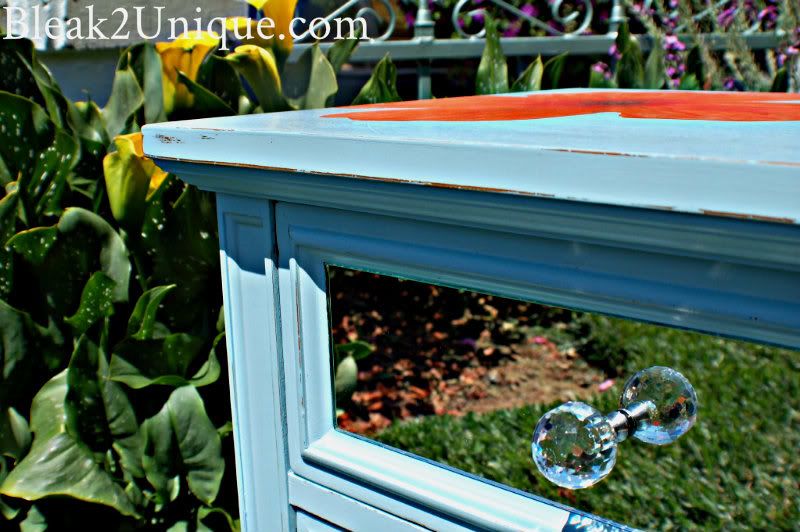
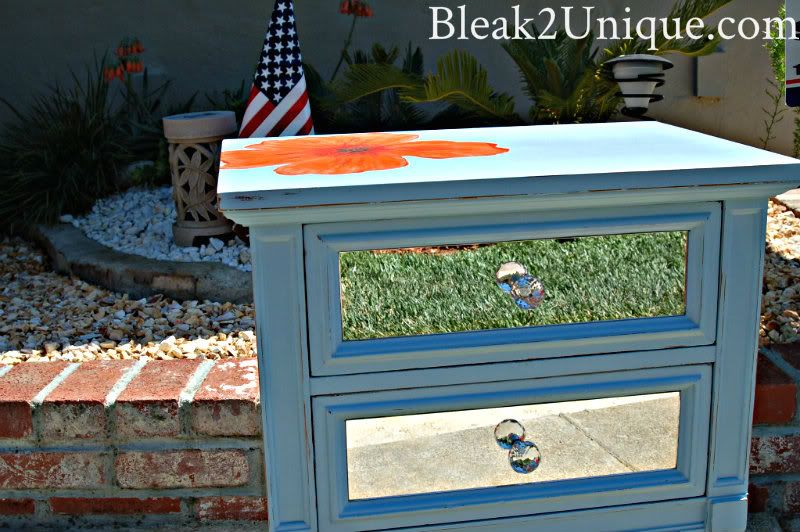
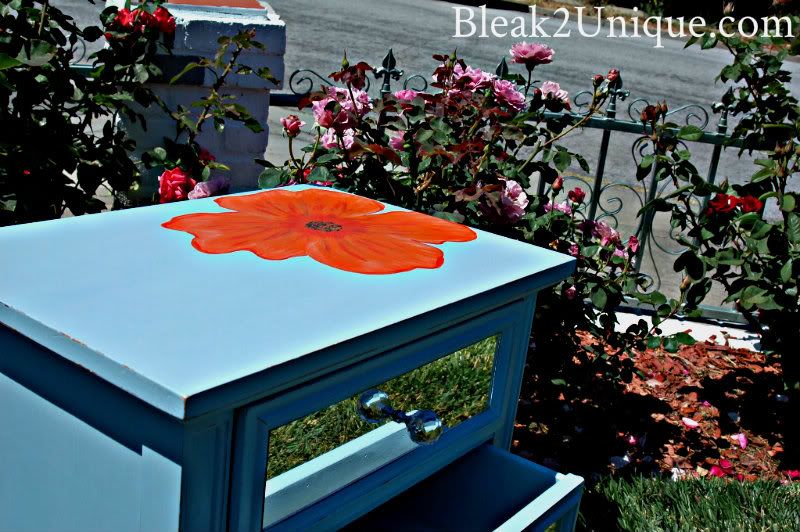
It was at this stage of the plan that I stood back to admire my creation, and I was disappointed...not the plan! I loved the distressed blue, and the touch of glam, but the drawer pulls didn't excite me, and they needed a punch of color. Time for a revised plan. I searched the web and found a little color inspiration...Orange!
 |
| Source - harvest furniture With the new color chosen I decided to paint a flower on the top of each table. When I painted my Nursery Mural I used stencils, but this time I wanted a more whimsical feel, so I started sketching... 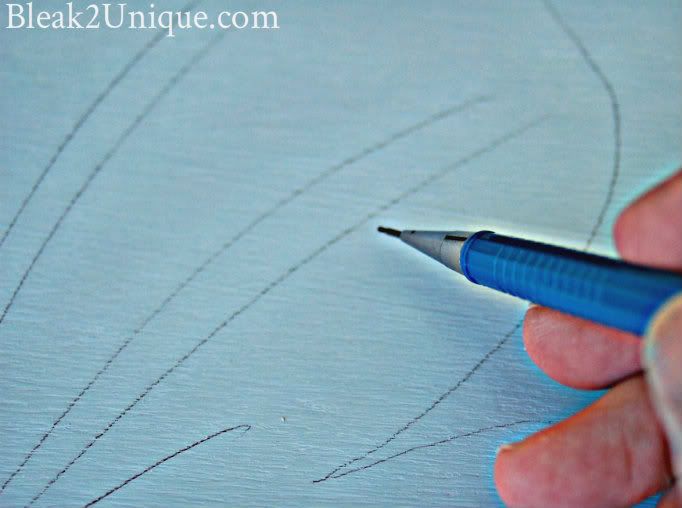 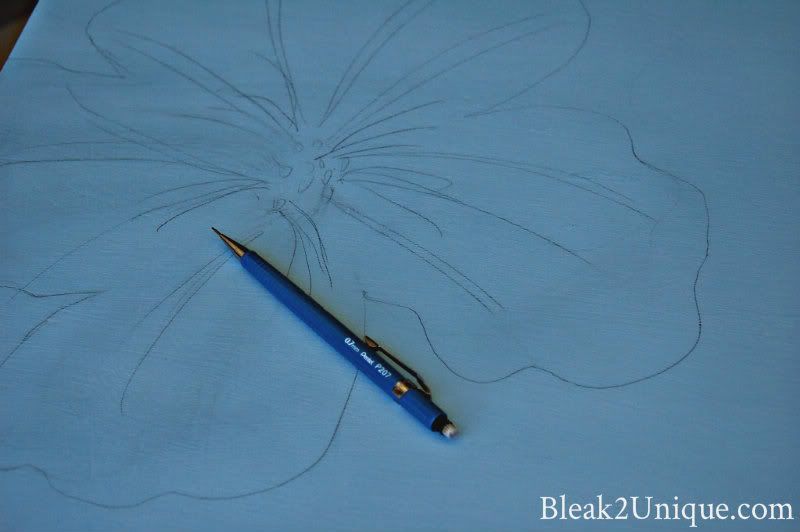
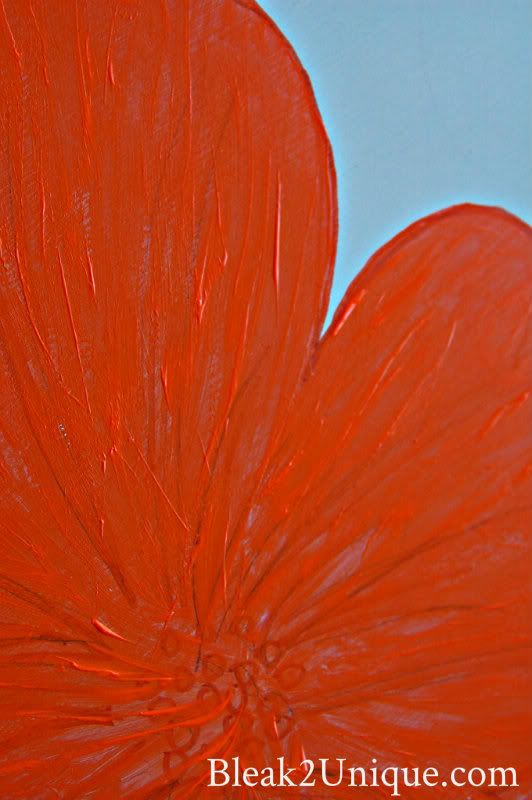
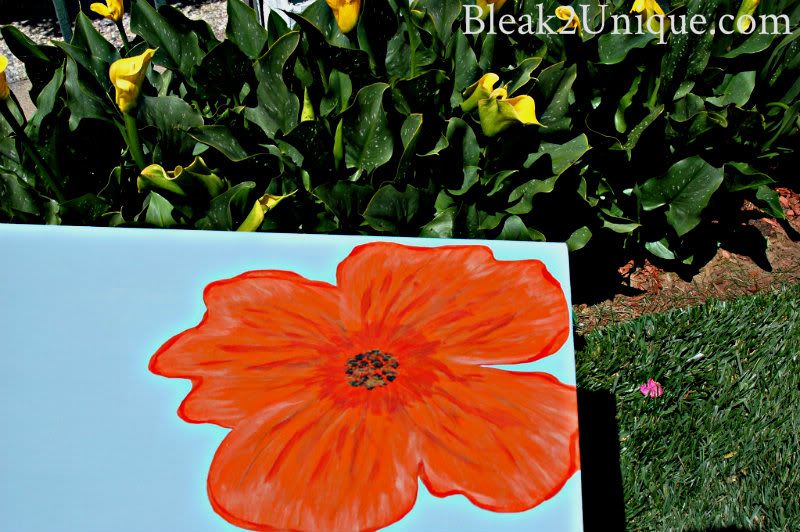
Before painting the flower I outlined my sketch with an orange Sharpie...

To paint the flowers I used orange, then added shading with red-orange, peach, and white. The center colors are brown and yellow...
  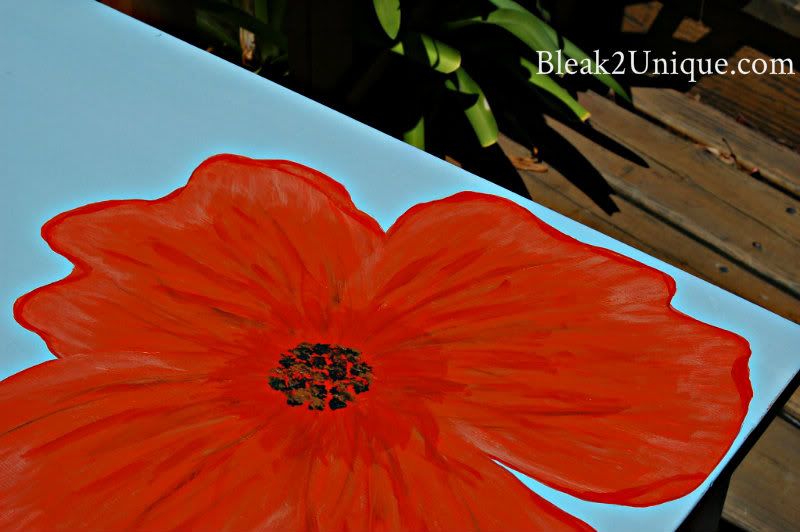
After the flowers were finished I waxed both tables....and then I giggled with delight! Seriously, I was so happy with the new pop of color, and I could hardly wait to see them finished. I only needed to secure the mirrors, find the perfect drawer pulls, and add a little something extra...

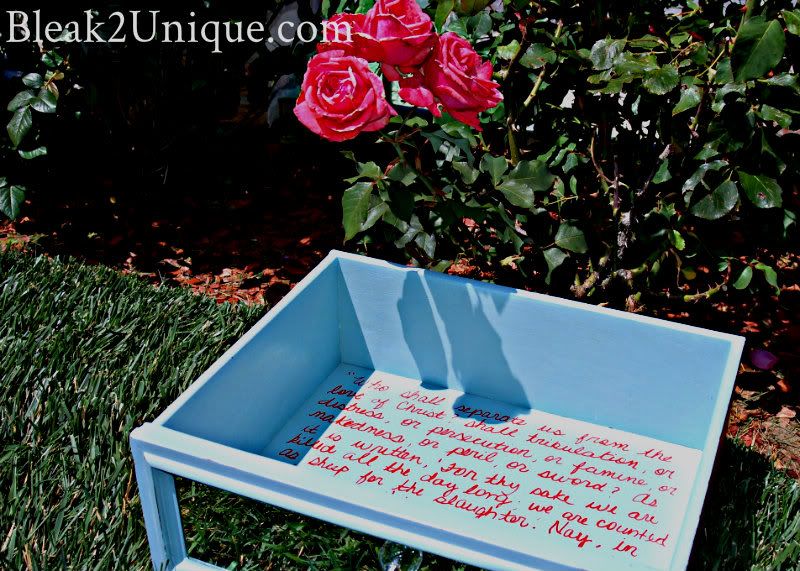
My something extra was adding my favorite passages of scripture to the inside of the drawers... a visual reminder of the power of God's love every day...
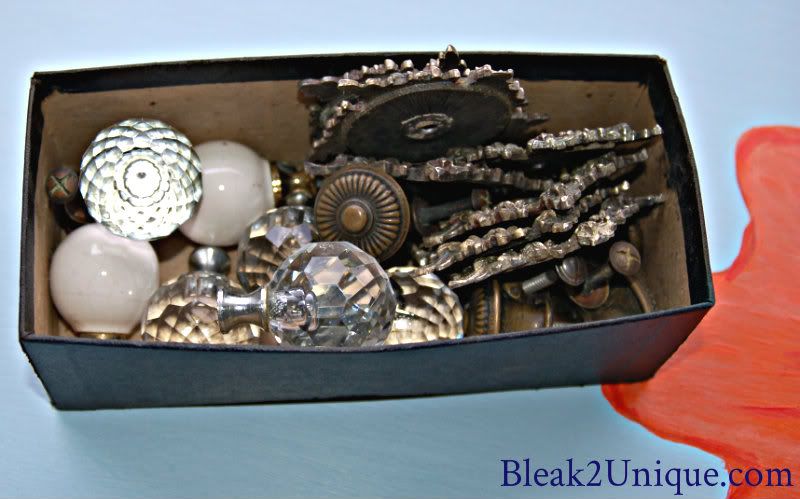
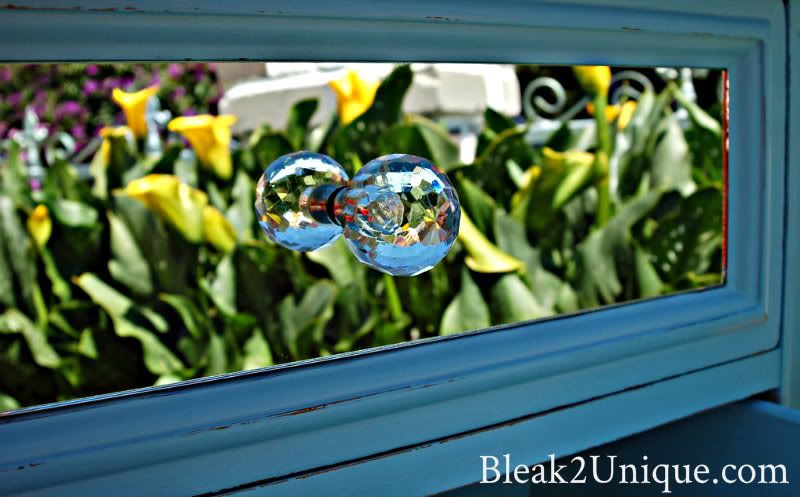
Before heading out to buy drawer pulls I remembered my recent Thrift finds, which included a few vintage glass knobs....Perfect! Wish I had thought of these BEFORE I spent all that time with the hack saw.
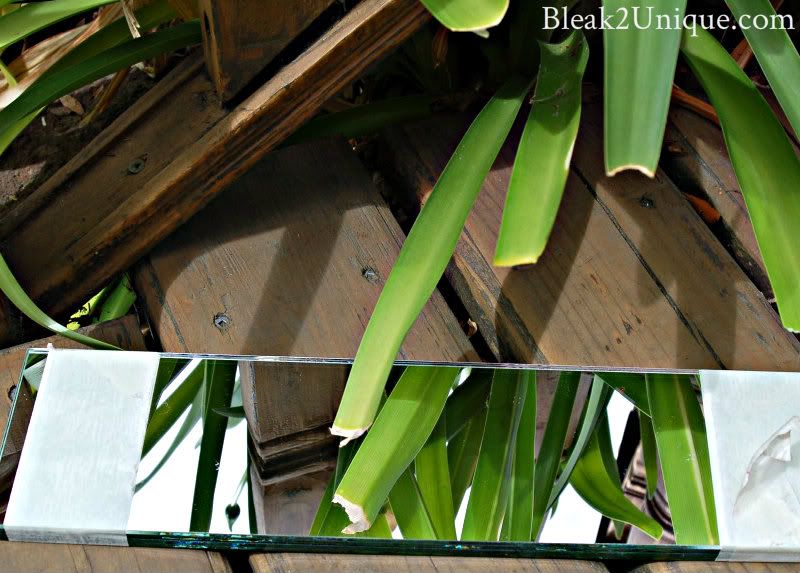
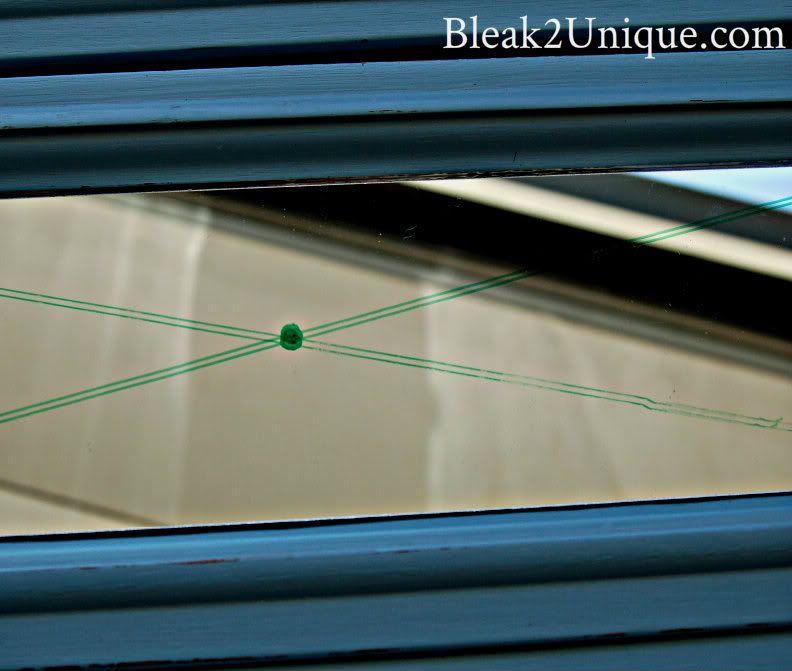
To find the center of each mirror I used a ruler to draw a straight line from corner to corner, like so...
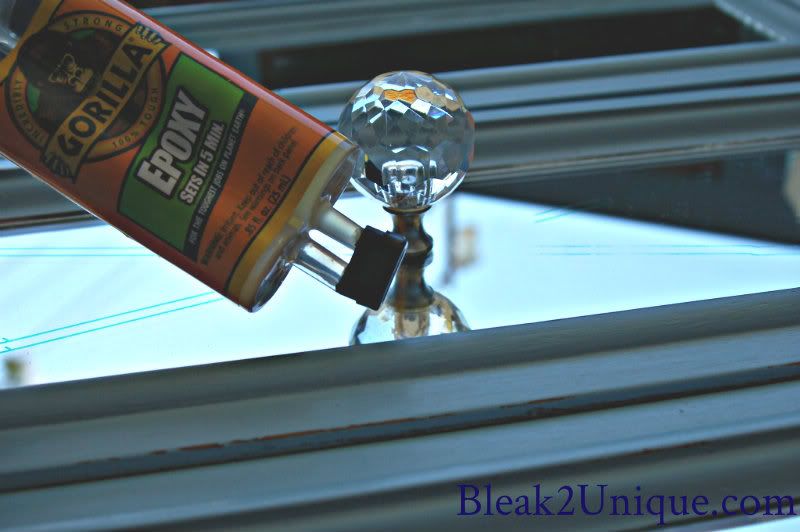
To finish up I attached the knobs to the mirrors with epoxy, and waited 24 hours for the epoxy to set.
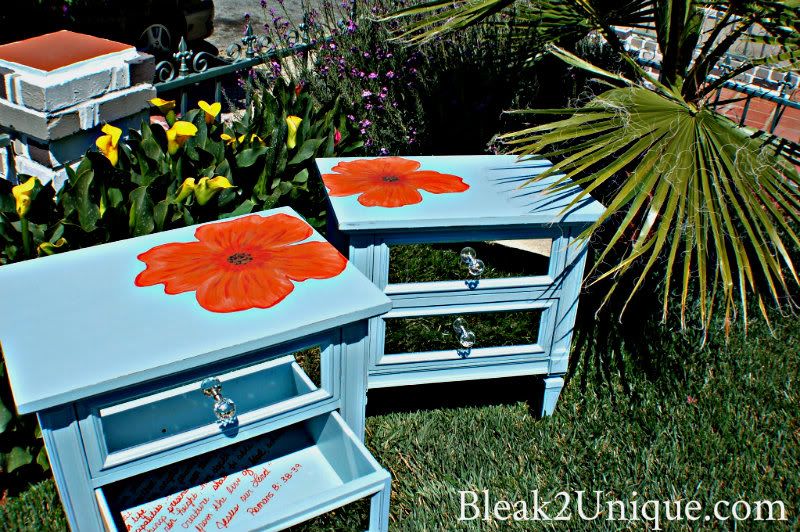
And finally my
"Southern Blue Belles" were done...Here they are...
          |
|
|


11 comments:
Love the inscription in the inside.
Wow! I would have never known those were the same tables!!! Great job. Pinning!
Great job Lori ... I would not have thought about mirrored drawer fronts, but they really look great. Love the flower too.
Blessings,
Audrey Z. @ Timeless Treasures.
What an awesome transformation!! I love the addition of the mirrors.
These are so beautiful! I need to pick up some furniture to redo so I can try your version of chalk paint - it looks awesome!
Brie @ Breezy Pink Daisies
I really love the colors and the mirror fronts! Great redo! :)
love love them they turned out great great job
What a beautiful job. I love them and you did a beautiful job painting the flowers. I would love for you to come by and share at my party Totally Transformed Tuesday. I know my readers would love to see them.
This is fantastic! I can't believe you thought to put an orange flower on there and that it would be so cool! And you free handed it too. I shall contain my jealousy.
those are beautiful, classic and mod at the same time!
We appreciate you sharing this useful information with us.
Do you have an anxiety disorder? If so, you should go there for treatment.
Post a Comment