25 Days of Christmas Blogshare
and
Today's My Day!
Merry Christmas Ya'll!
I'm honored to be hosting "Heirloom Christmas Ornaments"
on the 5th Day of the...

Gather 'round, grab a chair and join me in making a wonderful Christmas memory...A Christmas ornament that can be made to fit any style or decor, using almost any family treasure. Our family has been making our heirloom ornaments for over 50 years, and now I would like to share a tutorial so you can make your own family heirloom for Christmas!
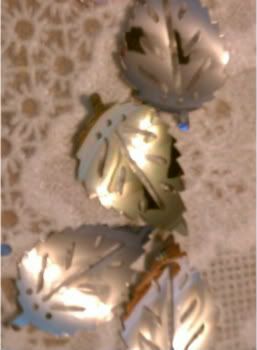
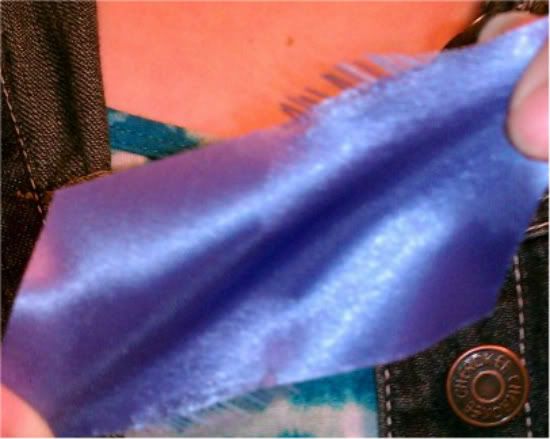
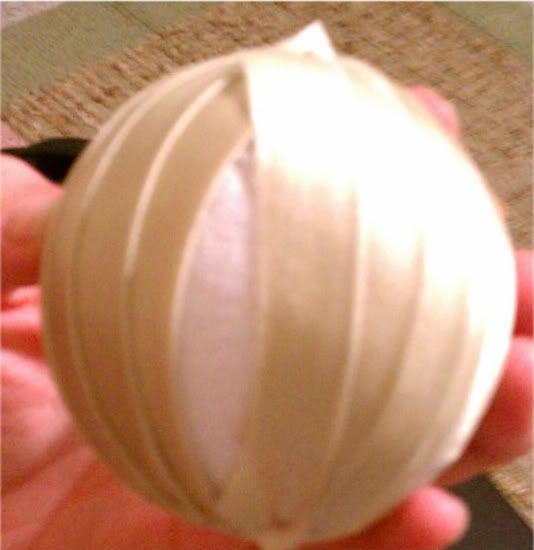
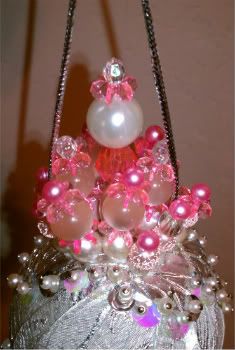
( Mouse over image below)
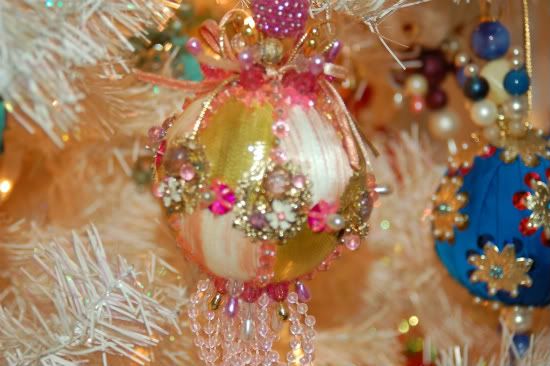 |
| A Sample of what you can do! |
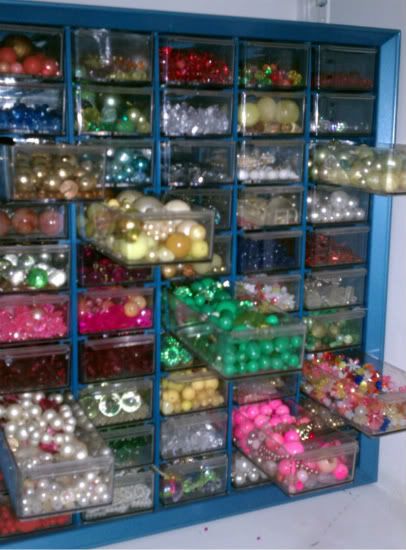
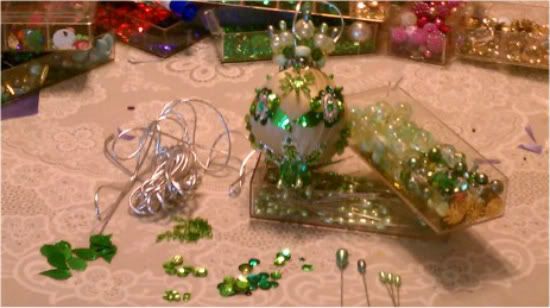
Let's get started by gathering all of our supplies. Luckily, my mom has been gathering ornament "goodies" for 50 years, so we have plenty...
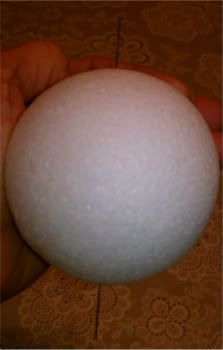 |
| Styrofoam ball |
|
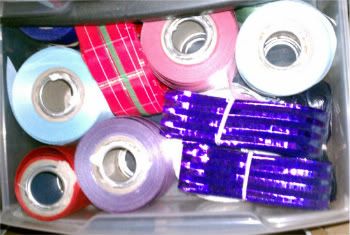 |
| 2 1/2 - 3 inch wide Ribbon |
|
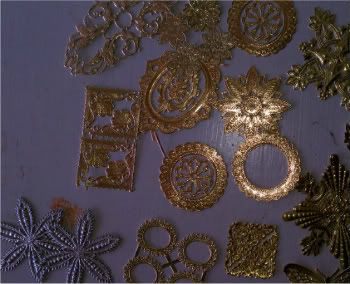 |
| Gold or Silver Foil Medallions |
|
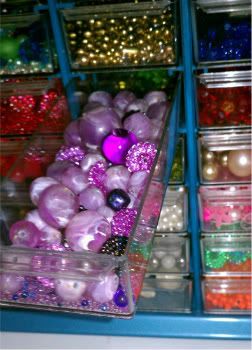 |
| Beads! Beads! Beads! |
|
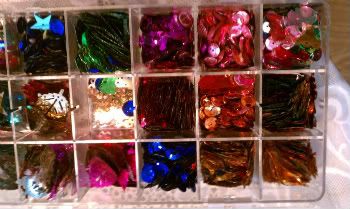 |
| Sequins |
|
 |
| More Sequins |
|
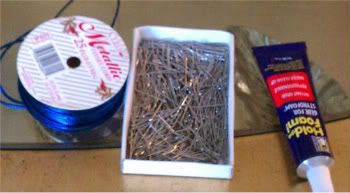 |
| Cord, Straight pins, Foam glue |
|
 |
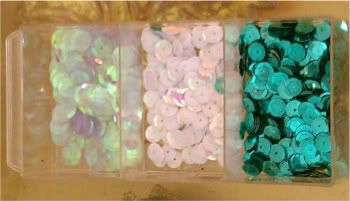
| Large Sequins |
|
Here's the list of supplies.....
- Styrofoam ball (2 1/2 inches)
- Wide ribbon (2 1/2 - 3 inches wide)
- Straight pins
- Foam glue
- Sequins (all sizes)
- Corsage and hat pins
- Beads (get 'em anywhere)
- Cord / Twine
- Gold or Silver foil doilies (optional)
- Whatever you want to include
At our house we pick 1 day each Christmas season,
and devote it to our ornaments....
Why?
Well, besides tradition....it takes the better part of a day....But, what fun we have! We each end the day with a beautiful heirloom ornament. So, what if it takes a little while, the results and the memories are well worth it! Can't start it today?....Pin it on Pinterest, pick a day and make it a tradition! With that said....Let's get the tutorial started...
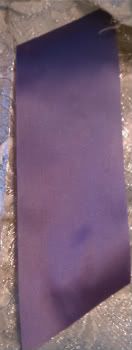
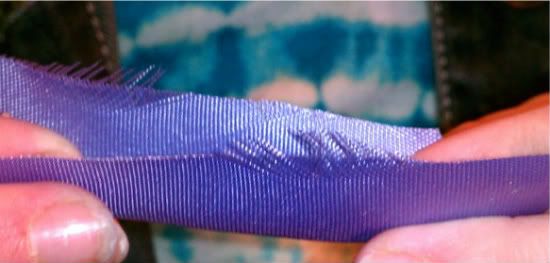
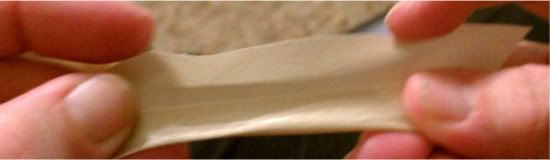
Get your favorite color of wide ribbon, and cut 23 to 25 angled strips
(about 30 degree angle), approximately 1 1/2 inches wide...
Cut! Cut! Cut!.....Like this:
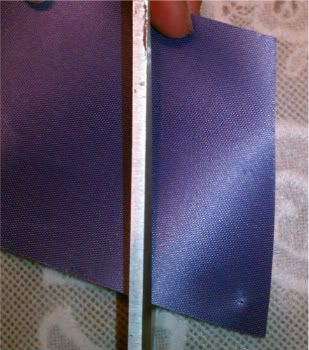 |
| Cut at a 30 degree angle |
|
 |
| Cut 23-25 of these |
|
Set your ribbon pieces aside and get your Styrofoam ball...an absolute must for every Christmas project! Place a straight pin partially in the styrofoam ball, then mark it with a marker...this is your top center. Put a second pin in the bottom center (eyeball it... top to bottom and side to side), and mark it. Perfection is NOT necessary.....Like this....
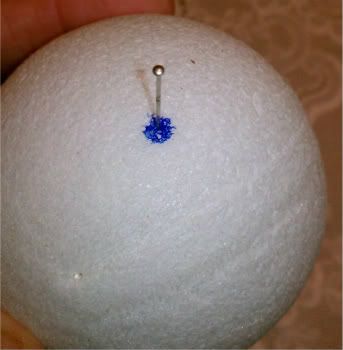 |
| Pin anywhere for top center...mark it |
|
|
| Top and bottom centers |
|
Now it is time to attach the ribbon. Hold the ribbon at the tips and pull...it will sound like it is ripping, but this is how you make the ribbon soft and pliable. Fold lengthwise in half and pin one end close to the top center. The ribbon needs to be pulled taut and then pinned close to the center bottom....Like this...
 |
| Pull at ends |
|
 |
| Fold in half |
|
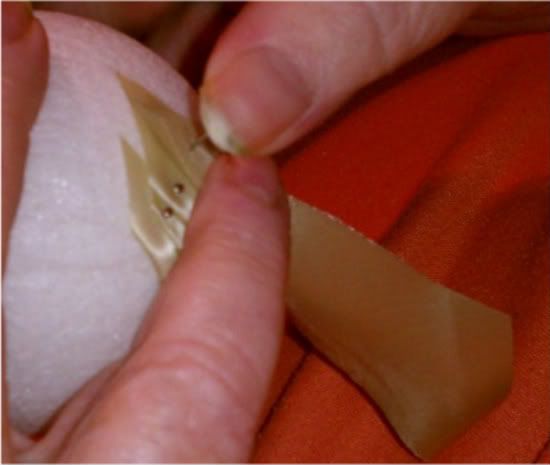 |
| Pin then pull taut |
|
 |
| After 2 strips pinned |
|
Continue to pin ribbon pieces until you get all the way around, clip ends as needed. Try to keep em' straight...watch out they can be slippery! It takes a few tries to get the hang of it, but I know you can do it....The last ribbon needs to folded in thirds...Like this...
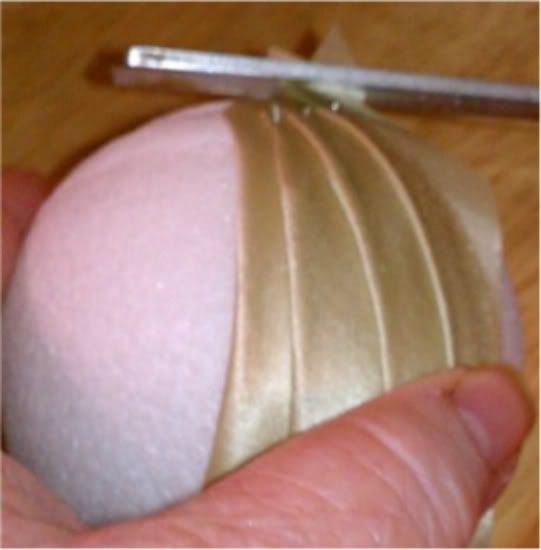 |
| Clip end pieces as needed...just a little |
 |
| Keep pinning until you get here |
|
 |
| Last ribbon foled in thirds |
|
 |
| Ribbon folded in thirds |
|
 |
| Pin the last ribbon for a finished edge |
|
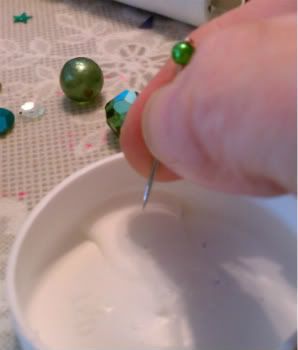
Whew!!! Now that your finished with the hard part it's time to get creative! Pick beads, sequins, family jewelry...if you can pin it on then try it! Pick one color or several to work with....whatever you like! Now that you've picked your fun stuff, it is time to cover the top and bottom centers....Like this....
 |
| Colored beads |
|
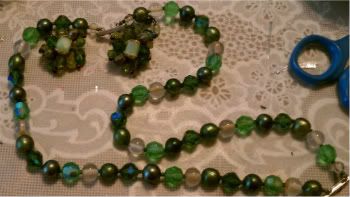 |
| Old forgotten Necklace |
|
 |
| Need to cover the ends |
|
 |
| Doilies can be cut to cover |
|
 |
| Cut up doilies |
|
 |
| Floral leaves?.....why not! |
|
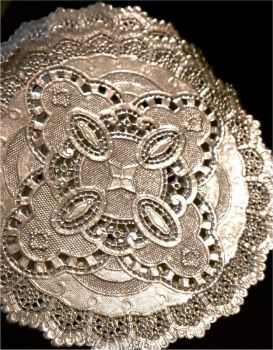
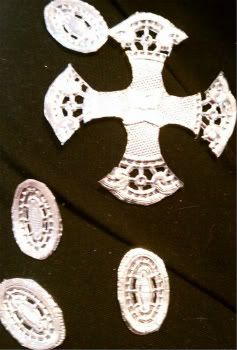
Like I said, we have been doing this for decades, so we do have some supplies that are no longer available. However, I grew up using gold and silver foil medallions, so I like to use my old trusted friends....Like this....
 |
| Extinct Foil Medallions |
|
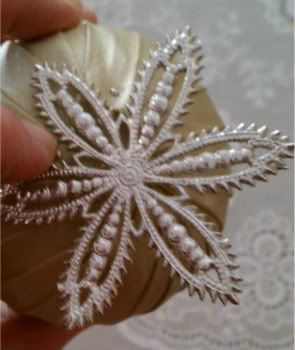 |
| My choice...reminds me of a snowflake! |
|
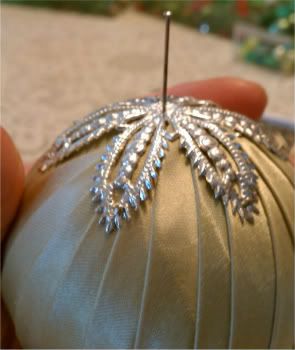 |
| Pin on whatever cover you choose |
|
|
| Large Sequins would work too! |
|
The great thing about these ornaments is that you can stop at any level you want...even now. It just depends on how simple or elaborate you want to make it. You can also use fabric to cover all or part of your heirloom....Silk, Satin, Burlap....whatever you like....Let your imagination take you away!
My mom likes glitz and glam so that is what prevails around here!
This is where your unique creativity takes over....so what brings you joy? If you have little ones, you can bring it to this point, and then let them take over....Kids love this part....we use glue! Are you ready for the next step?.....Let's go...
 |
| I decided on green |
|
 |
| Don't forget to glue each pin |
|
 |
| Add stuff you like....sequins? |
|
 |
| Bigger Sequins! |
|
Create your sides and then get your hat pins and corsage pins....don't forget the glue!
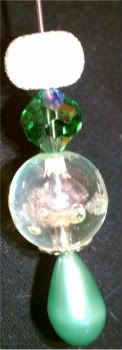 |
| Add beads to hat pins |
|
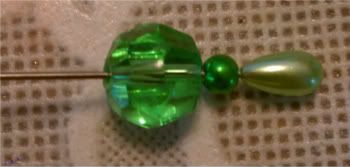 |
Add beads to corsage pins...
No beads?....Go get a necklace |
|
You need at least one corsage pin to hold the cord that you hang your ornament with.....all the others are optional....you decide! For my example, I used 1 large hat pin on the top and a dangle on the bottom center. Next, I added 2 beaded corsage pins on each side of the top...then 2 more...
Like this....
 |
| One hat pin in the middle |
|
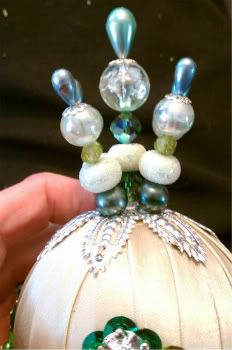 |
| Corsage pins all around |
|
One or two of the top pins needs to be used to glue the cord...you can use the middle hat pin, or two of the corsage pins on each side.....If the ornament is heavy I suggest balancing the weight between 2 pins....Like this....
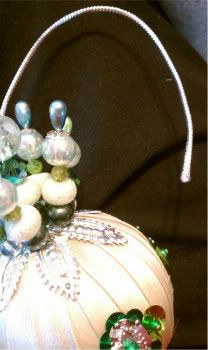 |
| Add cord for hanging |
|
 |
| Double cord and stick pin through...glue |
|
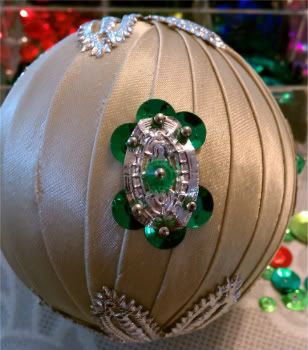
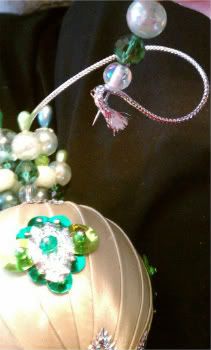
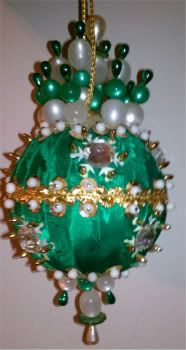
So, from here on out I just keep adding stuff until it is just right....or can't hold anymore, whichever comes first! For this year's ornament....I just couldn't stop. The rest of the process is pictured below. Can you stop?.....Keep going....Like this....
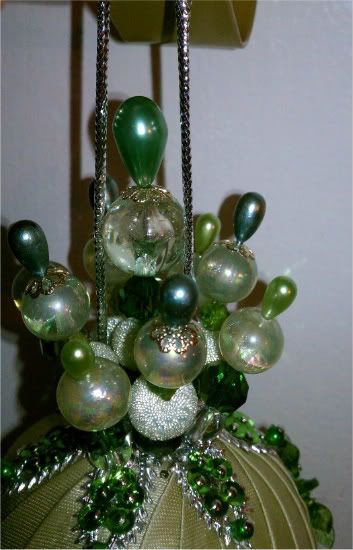 |
| A total of 8 beaded pins on top |
|
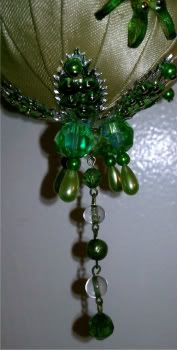 |
| 4 Beaded pins and a Dangle on the bottom |
|
 |
| Sequins to fill the foil medallion |
|
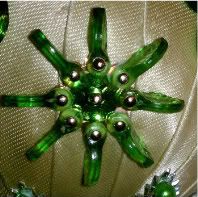 |
| Beaded Star accent |
|
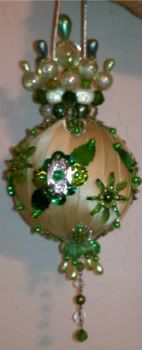 |
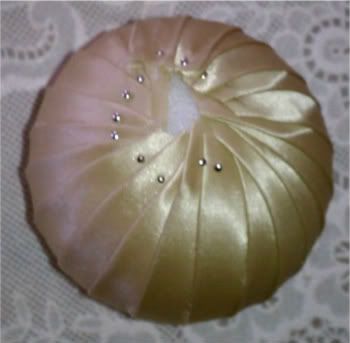
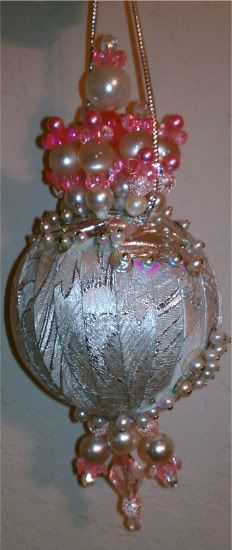
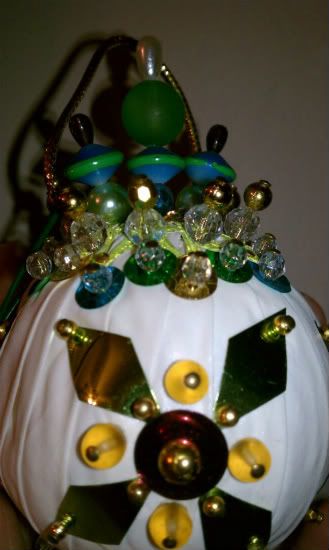
| My Heirloom Ornament 2011.... "Green with Envy" |
|
 |
| Done and Done....Supplies used |
|
The last step....Name your ornament! Here are a few more family treasures from years past....
 |
| "Blue Waves" |
|
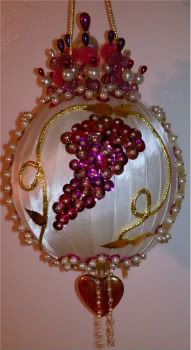 |
| "Grapes of Wreath" |
|
 |
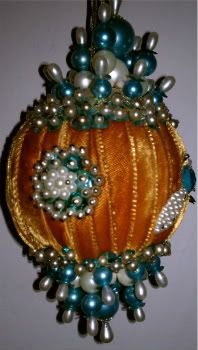
| "Eve's Fig Leaf" |
|
 |
| "Crushin' on Velvet" |
|
 |
| "Princess Dreams" |
|
 |
| She has bling |
|
 |
| "Retro Daze" |
|
 |
| "Little bit a Country" |
|
Now it is your turn to make your own Christmas memory....Enjoy every minute!!!
May God bless you and your family as He has always blessed ours!
Merry Christmas!
Be sure to check the Christmas Blogshare everyday in December. If you are not a follower of Bleak2Unique then I invite you to follow, because new friends are the greatest blessings any time of the year...
December Blogshare LineUp!
Christmas is my favorite time of year and I am so excited to be able to share a little of the excitement and fun with you!
Do you have a Christmas blog post you would like to share with our readers? Sign up on our linky below to share your posts! If you are one of our readers and would like to see more Christmas posts click on the Linky below!

Merry Christmas to All!


5 comments:
Hi Lori! Wanted to stop and let you know how gorgeous your ornaments are! I don't know which is my favorite, I do love the green one you made this year, but the one with the bling is alot my style! Thanks so much for sharing!
Kim @ tiarasandbowties.blogspot.com
PS I was wondering if the christmas link up on inlinks is a group thing we were to be doing? I don't remember getting that code. If you have it and it something we are all doing in the 25 days of Christmas, can you email me the link? Thanks!
These are beautiful! It reminded me of making ornaments using beads and pins when I was little, but of course they were nothing as fabulous as this!!!
Stopping by from the Blog Share. These ornaments are so beautiful. I can't imagine being able to create these, but I think I will give it a try, maybe start in January for next year!!. Have a Merry Christmas!
How awesome! Those ornaments turned out really nice! Very ornate!
I think it's cool that you're doing this 25 days of Christmas blogshare. It's a really cool idea! And how nice because then you only really have to write one blog post in this busy month of December :)
Thanks for coming to my blog. I'm following your blog too! :)
Love your ornament ideas in this post!
~Lisha
Hi Lori, these ornaments are priceless. I have never seen such beautiful handmade ones before. Congratulations and thanks for sharing. Happy New Year also. I have recently found your blog and am now following you, and will visit often. Please stop by my blog and perhaps you would like to follow me also. Have a wonderful day. Hugs, Chris
http://chelencarter-retiredandlovingit.blogspot.com/
Post a Comment